Donate!
Welcome, Guest. Please Login or Register :: View Members
Pages: 1 ... 3 4 5 6 7 ... 28
Send Topic Print
Double RYCA build Mar 2019 updates (Read 17413 times)
Gyrobob
Serious Thumper
*****
Offline

Posers ain't
motorcyclists

Posts: 2571
Newnan, GA
Gender: male
Re: Double RYCA Build -- boxes arrive 7 May
Reply #60 - 06/20/11 at 18:19:44
 
Thanks.  

It really is not very hard to do.  Just get the surface smooth, prime, color, and clearcoat.  It's not like the old days where you had to be a magician with a spray gun to find that elusive layer of paint that was just between orange peel and gullywasher.  With this paint all you have to do is get it wet, because all the color coats and clear coats just lay on.  You can easily err on the side of what used to be not enough paint because on the final coat you will be wetsanding with 2000 grit for a little, then rubbing it out.  Peesa kayk.
Back to top
 
« Last Edit: 06/22/11 at 06:59:19 by Gyrobob »  

If you think there's good in everyone, you haven't met everyone.
  IP Logged
sbaugz
Ex Member


Re: Double RYCA Build -- boxes arrive 7 May
Reply #61 - 06/20/11 at 18:23:43
 
Those duplicolor paints go on real well too, which helps. Much better than others. I have used duplicolor paints alot and like the results. Strong work.
Back to top
 
 
  IP Logged
Gyrobob
Serious Thumper
*****
Offline

Posers ain't
motorcyclists

Posts: 2571
Newnan, GA
Gender: male
Re: Double RYCA Build -- boxes arrive 7 May
Reply #62 - 06/20/11 at 18:57:54
 
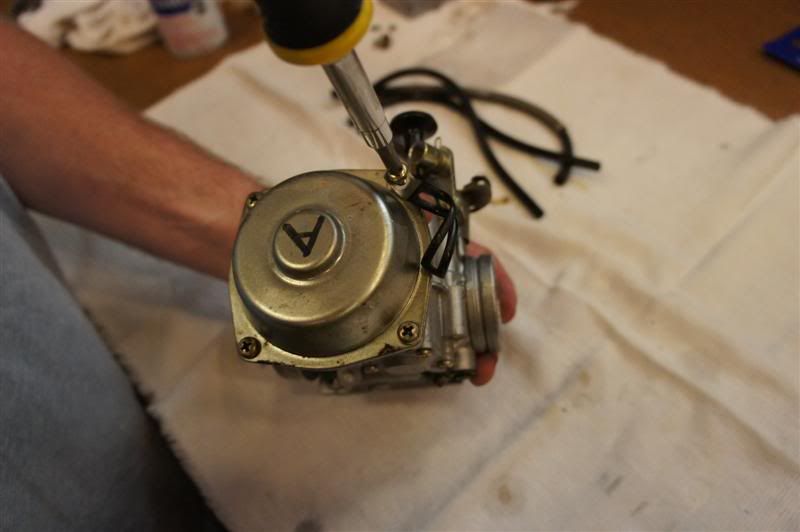
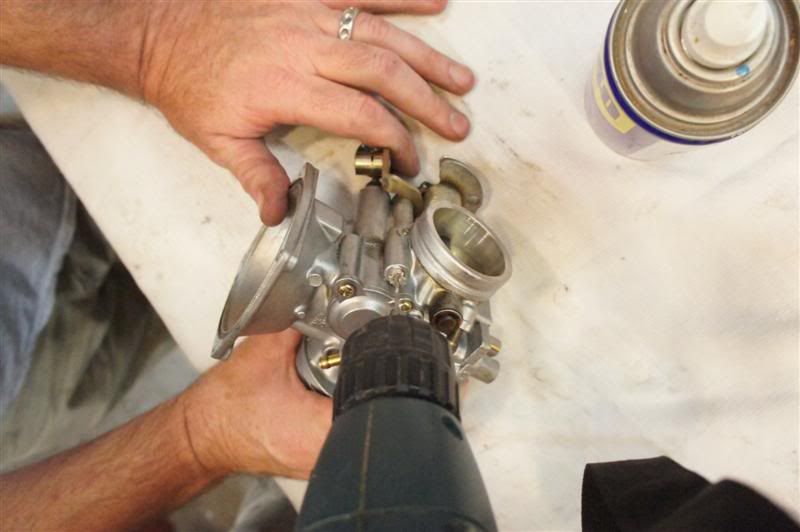
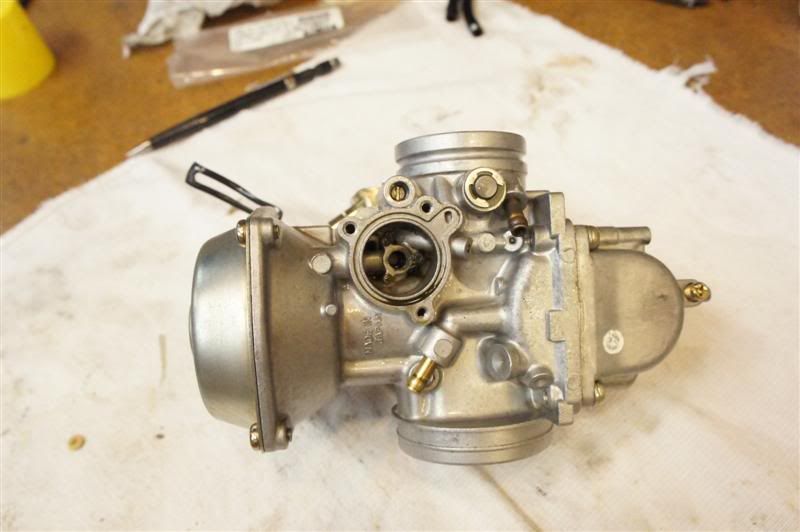
We did the carbs next,.. combining carb rebuild kits, and the stuff that came with the RYCA parts.  One bike had 14,000 mi and probably never had the carb touched.  All the phillips head screws were undamaged anyway, and they were really hard to unscrew.  The other bike was two years newer and only had 4000 mi, but its screws seemed welded on as well.

We studied a lot of the threads on carb rebuilding and tuning -- very very helpful!


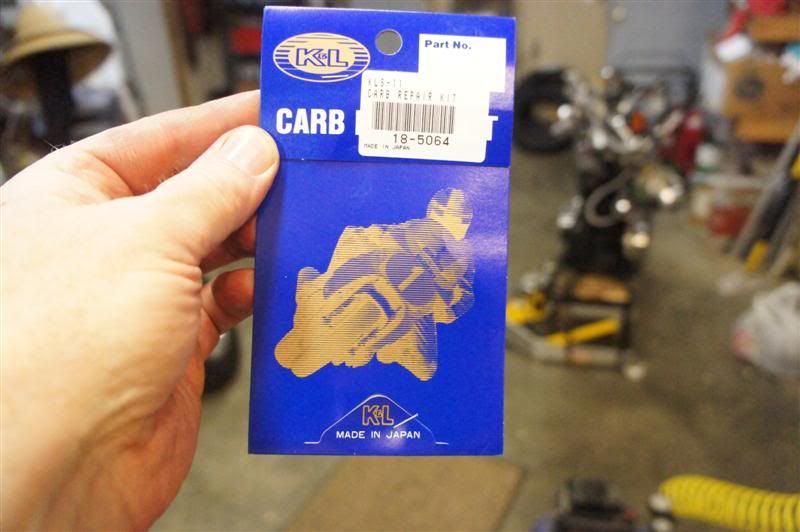
We got the rebuild kits from Tike's Cycle Parts on ebay.  Great place, instant shipping.  The folks were real helpful in verifying that the kit works on 2002 Savages even though it is labeled to only go up to 2001.  $12.99 each for the kits, with a shipping discount for multiple items.


Getting ready to operate.  Cleanliness is a biggy.


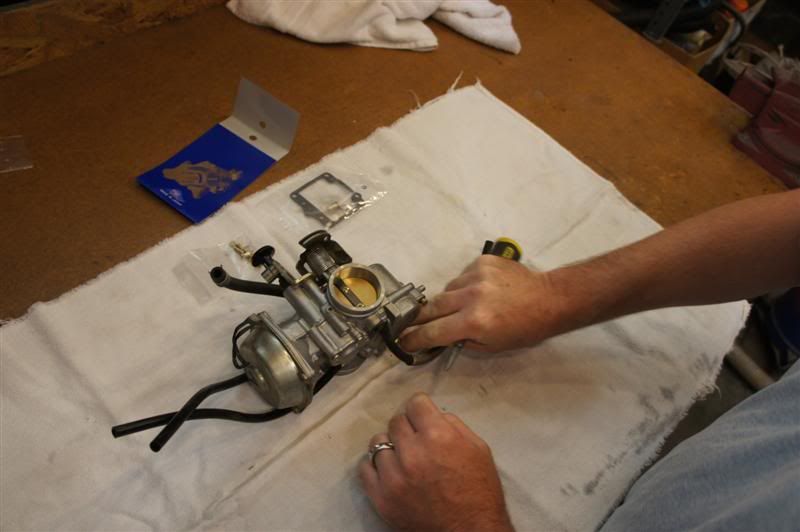
We took lots of pics to make sure we knew what it looked like before we took it apart.


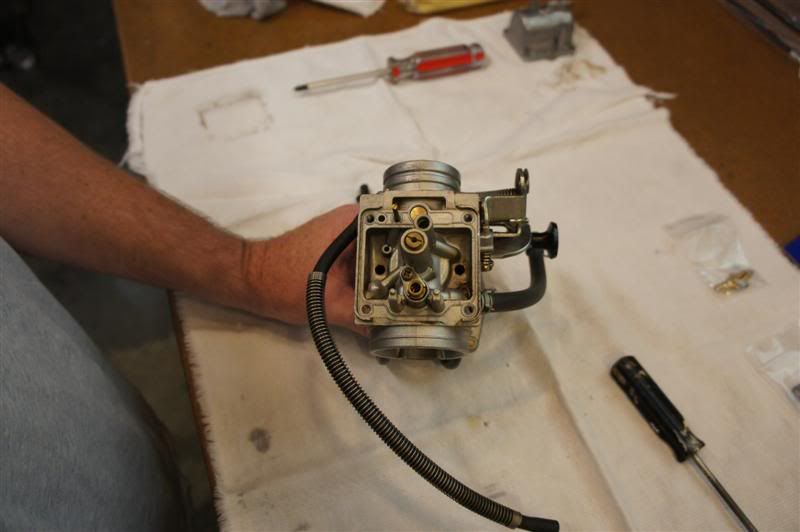
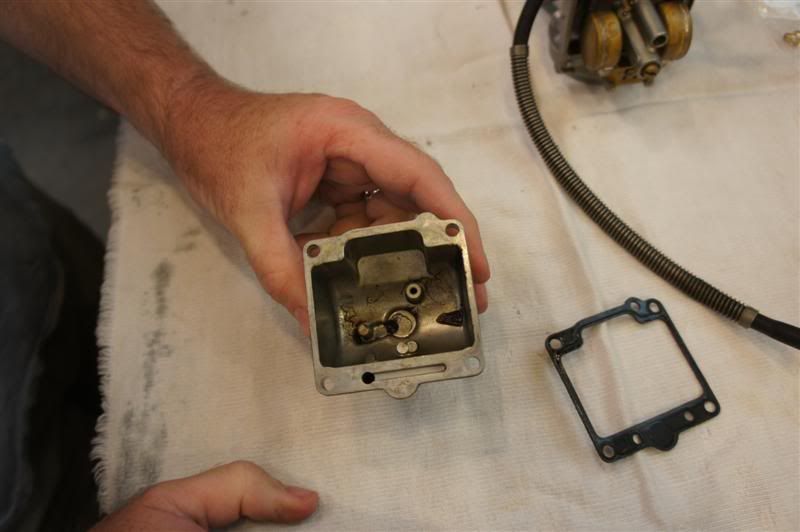
The first carb had lots of muck in the float bowl.  (so much for the screen on the petcock, eh?)


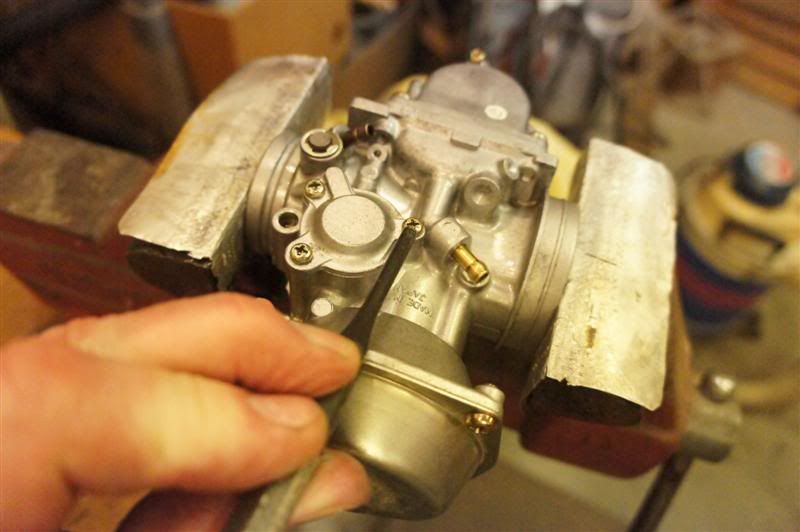
These screws were welded in, it seemed.  We were lucky enough to recognize the phillips head deforming before we obliterated it.  We finally shocked them loose like the transient enrichment valve screws shown a few pics below.


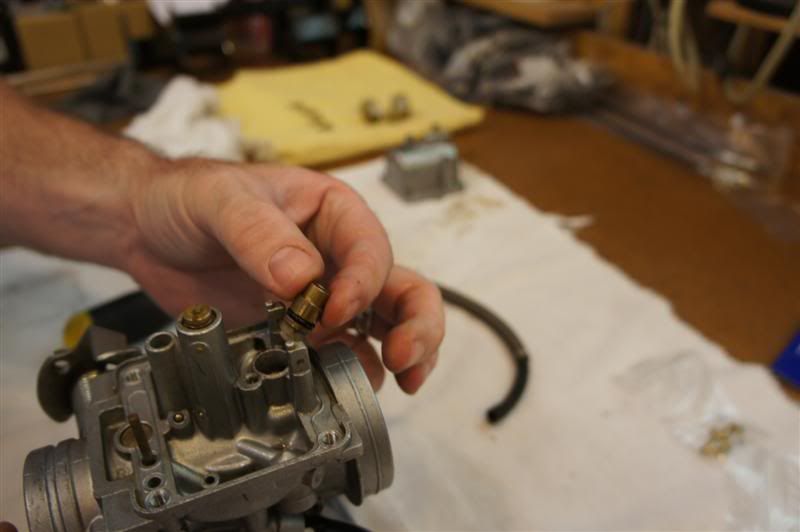
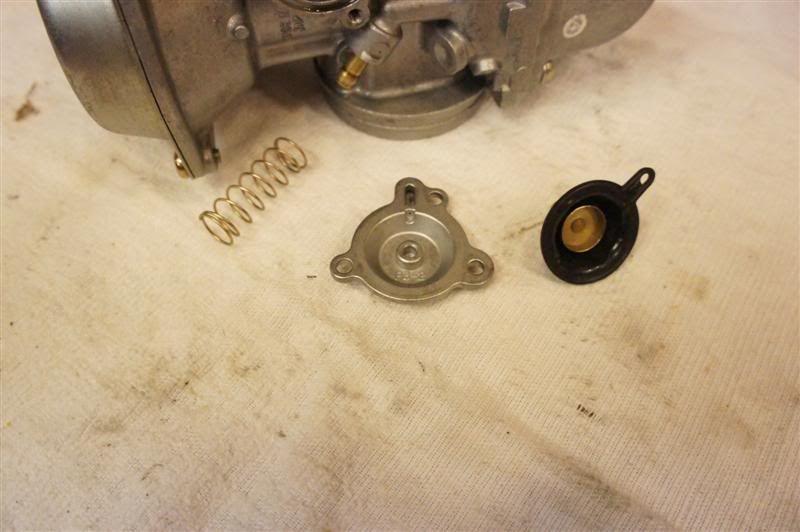
The famous white spacer.  We replaced it with two of the thin RYCA-supplied washers.  That thing Jud is holding in his right hand can go back in in lots of wrong ways. incorrectly quite easily. Make sure you note how the holes line up and which way the protrusion (depression?) (dimple?) sits before you disassemble it.


Treat the diaphragm very gently.


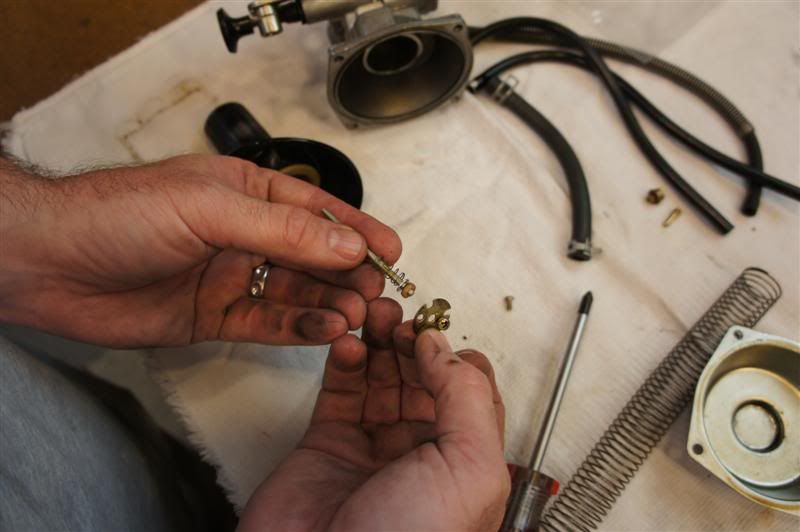
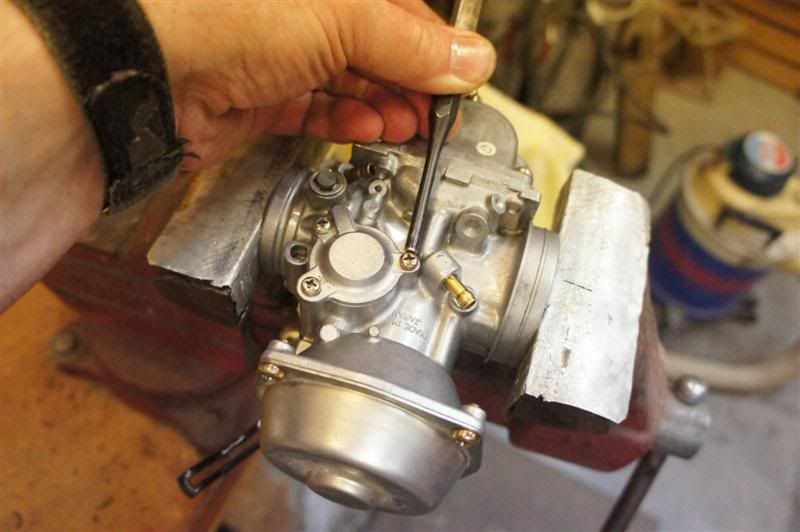
Removing the plug covering the idle mixture adjuster.  Once you drill a small hole (1/16”?) just put a really small self-tap screw in the hole and yank the plug out.  Now the idle mixture can be adjusted.


The next two pics show how we shocked the screws loose in lots of places on these carbs.  The carb is firmly (but not crushingly) held in a vise lined with soft aluminum.  Use a flat punch or drift to knock each screw back and forth a tiny bit.  As soon as you see any movement, you can unscrew it.  Go easy.


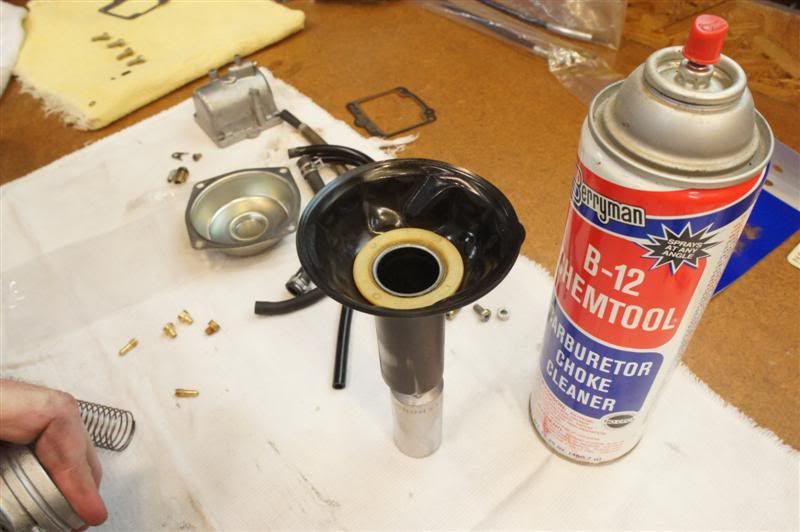
Transient enrichment valve diaphragm.  Fortunately both of ours looked nice.  Not very clean, though.  This thing can affect the popping/backfiring on deceleration so often discussed here.


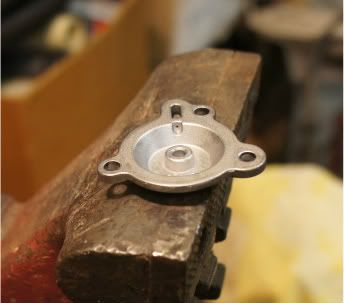
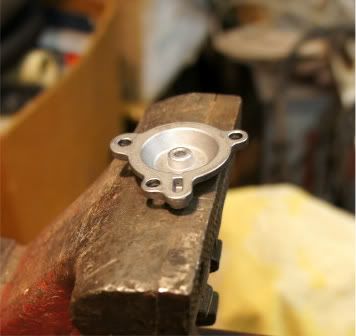
Brown cakey stuff underneath the diaphragm.


The next three pics show a nearly microscopic hole in the diaphragm cover that goes from the slot in the cover to the diaphragm compartment.  The 14,000 mi bike had muck in this hole.  The other bike looked clean, but we ran some carb cleaner and some thin strands of copper wire through the hole, then blew it out with compressed air.  Amazing that this hole, if dirty, can cause the bike to backfire,.. maybe.
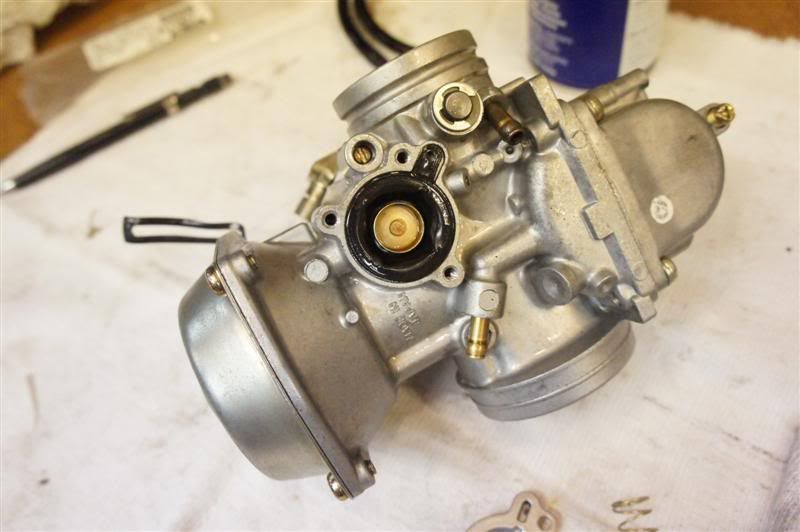


We won’t know for a while, but we feel good about getting the carbs cleaned well, and put back together properly.  At least we didn’t have any parts left over.

Added comment September 2012: The carbs on both bikes work perfectly,... both bikes started right up on the first try.  (well, on one of them we needed to adjust the compression release,.. it was not letting the exhaust valve seat completely.)  Anyway, the carb work we did paid off.  No backfires other than the typical moderate popping and gurgling during decel.  Jud's always goes POP!! when he shuts it off, mine sounds like a muffled cough sometimes when shut off.


Back to top
 
« Last Edit: 10/03/12 at 06:13:26 by Gyrobob »  

If you think there's good in everyone, you haven't met everyone.
  IP Logged
spacepirates
Serious Thumper
*****
Offline

Igni Ferroque

Posts: 515
Pittsburgh, PA
Gender: male
Re: Double RYCA Build -- finally!! some constructi
Reply #63 - 06/21/11 at 07:56:44
 
so you say that "thing Jud is holding" ... "can go back in lots of wrong ways"

any idea what the right one is? hard to tell from the pic.
Back to top


--
Only a biker knows why a dog sticks his head out of a car window.
  IP Logged
jdeluca
Junior Member
**
Offline

SuzukiSavage.com
Rocks!

Posts: 62
South of Boston, MA
Gender: male
Re: Double RYCA Build -- finally!! some constructi
Reply #64 - 06/21/11 at 08:15:04
 
Actually, there's only a couple ways it can go in.
The proper way is so that the 4 holes in the bottom line up.  2 of them are for the screws, and the other 2 line up with the slots in the brass plate.  When you try to put it together, you'll see what I mean.  The only 2 ways it can go in would be 2 non-threaded holes covered or 2 non-threaded holes not covered.  You want the not covered way.
Smiley
Back to top
 
 
delucaja   IP Logged
spacepirates
Serious Thumper
*****
Offline

Igni Ferroque

Posts: 515
Pittsburgh, PA
Gender: male
Re: Double RYCA Build -- finally!! some constructi
Reply #65 - 06/21/11 at 10:42:23
 
jdeluca wrote on 06/21/11 at 08:15:04:
Actually, there's only a couple ways it can go in.
The proper way is so that the 4 holes in the bottom line up.  2 of them are for the screws, and the other 2 line up with the slots in the brass plate.  When you try to put it together, you'll see what I mean.  The only 2 ways it can go in would be 2 non-threaded holes covered or 2 non-threaded holes not covered.  You want the not covered way.
Smiley


now I can't remember if that is how I put it back together or not. guess it is time to refresh my memory and open her back up.
Back to top


--
Only a biker knows why a dog sticks his head out of a car window.
  IP Logged
Savage 1987
Junior Member
**
Offline

SuzukiSavage.com
Rocks!

Posts: 56

Re: Double RYCA Build -- finally!! some constructi
Reply #66 - 06/21/11 at 11:03:26
 
All these new threads about people receiving their Ryca parts is making me all giddy!  I am still waiting for mine, but I know that any day now I will be getting my final invoice and my parts.

Gyrobob, great write ups and pictures.  I will definitely be referring back to this information when I starting building.
Back to top
 
 
  IP Logged
RpNSht
Ex Member


Re: Double RYCA Build -- finally!! some constructi
Reply #67 - 06/21/11 at 12:54:51
 
have you considered the spring mod on the carb as well?
i did it when my bike was pretty much stock and the back firing went away completely...im interested to see how it goes with the new jets

http://suzukisavage.com/cgi-bin/YaBB.pl?num=1268545171/0
Back to top
 
 
  IP Logged
Gyrobob
Serious Thumper
*****
Offline

Posers ain't
motorcyclists

Posts: 2571
Newnan, GA
Gender: male
Re: Double RYCA Build -- finally!! some constructi
Reply #68 - 06/22/11 at 06:47:39
 
jdeluca wrote on 06/21/11 at 08:15:04:
Actually, there's only a couple ways it can go in.
The proper way is so that the 4 holes in the bottom line up.  2 of them are for the screws, and the other 2 line up with the slots in the brass plate.  When you try to put it together, you'll see what I mean.  The only 2 ways it can go in would be 2 non-threaded holes covered or 2 non-threaded holes not covered.  You want the not covered way.
Smiley


jdeluca is exactly correct.    

Check for the holes in the diaphragm to line up with the slots in the lockplate (see "B" in the pic below), and make sure the protrusion in the center of the lockplate is on the underside so it pushes down on the spacer ring.


Back to top


If you think there's good in everyone, you haven't met everyone.
  IP Logged
Gyrobob
Serious Thumper
*****
Offline

Posers ain't
motorcyclists

Posts: 2571
Newnan, GA
Gender: male
Re: Double RYCA Build -- finally!! some constructi
Reply #69 - 06/22/11 at 06:53:34
 
Savage 1987 wrote on 06/21/11 at 11:03:26:
All these new threads about people receiving their Ryca parts is making me all giddy!  I am still waiting for mine, but I know that any day now I will be getting my final invoice and my parts.

Gyrobob, great write ups and pictures.  I will definitely be referring back to this information when I starting building.


Thanks for the comments.  One of the main reasons I am trying to post as much as possible here is just for what you said.  I know I have been helped immensely by being able to follow the trails blazed by all the savage-o-holics here.  While I don't even pretend to know as much about this marvelous motorcycle as the gurus here, maybe I can show some minefields I stepped into that you can avoid, eh?
Back to top


If you think there's good in everyone, you haven't met everyone.
  IP Logged
Gyrobob
Serious Thumper
*****
Offline

Posers ain't
motorcyclists

Posts: 2571
Newnan, GA
Gender: male
Re: Double RYCA Build -- finally!! some constructi
Reply #70 - 06/22/11 at 06:58:47
 
wheelchairstuntn wrote on 06/21/11 at 12:54:51:
have you considered the spring mod on the carb as well?
i did it when my bike was pretty much stock and the back firing went away completely...im interested to see how it goes with the new jets

http://suzukisavage.com/cgi-bin/YaBB.pl?num=1268545171/0


Yes, I am strongly considering the transient enrichment valve spring mod.  Our main focus, though, for the next several days is just to get these things on the road!!  So, depending on how they run after the mods so far (RYCA exhaust, RYCA carb parts, uncovered mixture screw, K&N filter), we'll have a better idea on how much the spring mod is needed.
Back to top


If you think there's good in everyone, you haven't met everyone.
  IP Logged
Gyrobob
Serious Thumper
*****
Offline

Posers ain't
motorcyclists

Posts: 2571
Newnan, GA
Gender: male
Re: Double RYCA Build -- finally!! some constructi
Reply #71 - 06/25/11 at 10:24:03
 
Next we actually started installing RYCA stuff.  Finally.  Here's what Jud's bike looked like when we started this phase.


Here's Bob's bike doing a wheelie in celebration of getting some clip-ons, a swingarm and some tires and wheels.


Jud's bike with a similar state of construction,.. tank and seat just placed on top.


Both bikes the next day with more stuff installed.  Painting about halfway done.  Experimenting with brake cable.


Here's a pic of the RYCA rear brake cable installation.  Sbaugz (thanks for the pic) did it just the way RYCA intended.  It certainly looks tidy, but the way the cable is routed without the end of the cable secured bothers us some, so we are experimenting with other ways better secure the end of the cable sheathing.


A longer bolt on the footpeg lever sticks out far enough to have the end of the brake cable fastened to it.  The end of the cable sheathing is rigidly fastened to the 4" long bracket which is bolted to the heavy footpeg bolt.

A close up view of the additional bracket showing the rigid clamping of the end of the cable sheathing.


Another view
 

Trying to show the dremeled-out concave "slot" the barrel at the end of the cable fits into.


This is just a first attempt.  There will be variations.  Anyone got any suggestions?    Huh

Back to top
 
« Last Edit: 06/26/11 at 06:06:10 by Gyrobob »  

If you think there's good in everyone, you haven't met everyone.
  IP Logged
MotoBuddha
Serious Thumper
*****
Offline

Let's roll!

Posts: 1416
Charlotte, NC
Re: Double RYCA Build -- finally!! some constructi
Reply #72 - 06/25/11 at 10:31:38
 
That's a much cleaner solution.

How much slack is there in the wire from the switch to the rest of the harness? I was wondering if the switch could be relocated. Of course, lengthening some wires, if necessary, might not be the hardest part.

Oh, wait--what if the brake light is just wired to an accelerometer?  Grin But, you know, there must be some kind of digital solution.
Back to top


Travel kills ignorance.
  IP Logged
MotoBuddha
Serious Thumper
*****
Offline

Let's roll!

Posts: 1416
Charlotte, NC
Re: Double RYCA Build -- finally!! some constructi
Reply #73 - 06/25/11 at 11:01:27
 
I might have found something. My understanding of electricity is rudimentary, but it seems like we could replace the stock switch with a snap acting switch wired to close the circuit when pressure is off its lever.

http://www.mcmaster.com/#micro-switches/=cwjc9n

Scroll down for corrosion resistant and mil spec versions.

The switch could be mounted so that the arm on the pedal releases the switch lever when the pedal is pushed. For example, using that extra bracket you bolted to the rear-set, you could attach a switch so the long bolt you used to attach the brake rod presses the switch closed (off). Then when you push the pedal, the long bolt would rise, releasing the switch and turning it on.
Back to top


Travel kills ignorance.
  IP Logged
sbaugz
Ex Member


Re: Double RYCA Build -- finally!! some constructi
Reply #74 - 06/25/11 at 11:57:47
 
in all honesty, does it really matter if the rear brake control triggers the tail light or not? I almost never use my rear brake anyways. THe fronts trigger it, so to me its really a mute point.
Back to top
 
 
  IP Logged
Pages: 1 ... 3 4 5 6 7 ... 28
Send Topic Print


« Home

 
« Home
SuzukiSavage.com
05/04/24 at 06:22:52


General CategoryRubber Side Down! › Double RYCA build Mar 2019 updates


SuzukiSavage.com » Powered by YaBB 2.2!
YaBB © 2000-2007. All Rights Reserved.