Donate!
Welcome, Guest. Please Login or Register :: View Members
Pages: 1 2 3 4
Send Topic Print
My trip down RYCA lane (Read 1855 times)
Gheorghe
Junior Member
**
Offline

SuzukiSavage.com
Rocks!

Posts: 88

My trip down RYCA lane
07/30/13 at 19:42:08
 
Hello all,

I haven't posted on here much but I have been a long time lurker. Up till last year I really didn't know much about the Savage/S40/LS650 but with the help of this site I have become very familiar with this little bike. I must admit that what had me looking at the S40 was the the very first RYCA conversion I had seen which was done by member "RpNSht". As soon as I saw his bike I knew that I wanted one. Long story short, I started my search early this spring and this is what I bought on April 27th:


Yes, windshield, saddlebags and all the fixins that would need to be taken off  in order to make it leaner and meaner.  Roll Eyes Bike is an 06, has 3,300 miles, very clean and two previous owners. It looks like it was very well taken care of, it runs pretty good, does have a gnarly back fire ...........and is exactly what I wanted.  
A few minutes after I got it in the garage:


Cool Cool
Lighter and Better  Grin

More to come.............
Back to top
 
 
  IP Logged
Gheorghe
Junior Member
**
Offline

SuzukiSavage.com
Rocks!

Posts: 88

Re: My trip down RYCA lane
Reply #1 - 07/31/13 at 09:39:35
 
So the goal for the RYCA build is clean and lean. I want to get rid of all unncessary wires tabs and holes that are not used. This also included smoothing everything out.

A lot of the inspiration for this bike came from the original RYCA bike that the company Built:
http://thekneeslider.com/images/2010/05/ryca-cs1.jpg

and two previous builds that many people may have seen. Thank you gents!! The first is RpNSht --->http://suzukisavage.com/cgi-bin/YaBB.pl?num=1304297812/0#0/
and the second is from Gyrobob ---http://suzukisavage.com/cgi-bin/YaBB.pl?num=1304722902/0

I did a lot of the same tricks that they did in their builds and some of my own.

The RYCA Kit was orders on April 29th and consisted of:
-Black Vinyl Seat
-Standard Chrome Shocks
-Unlaced ploished rear rim
-spedo and tech

I planned on running Firestone Champion tires as in the original RYCA build but after doing some research and finding out that they may not be the best for handeling I decided on running Dunlop K70s instead. Also, I modified my own swing arm.

I sent RYCA my tank on May 1st


And then the fun began...
Back to top
 
 
  IP Logged
Gheorghe
Junior Member
**
Offline

SuzukiSavage.com
Rocks!

Posts: 88

Re: My trip down RYCA lane
Reply #2 - 07/31/13 at 09:58:00
 
So while I was waiting for the RYCA parts to come in I decided to keep myself busy.
The first things I tackled were the mirror mounts. I planned on running bar end mirrors so no need to things sticking out unused.
This is what Mr. Grinder and I started with:


I was hoping that the perch would have a blind hole for the mirror mount and that simply grinding it off would reveal a smooth surface but that is not the case........oh well


So to close the hole and keep things smooth and seamless, I decided to use a bolt to plug the hole...but how do you make it so the bolt doesn't move?? Loktite is an answer but I was afraid that baking the part during the powder process might weaken the bond and later come undone. A beer later, I figured that I'd use a bolt of the same diameter but different thread pitch and just "strip the threads". So I got this:


By this time I started using Mr. File and Mr. Sand paper. The intent wasn't to polish the piece as the powered coat will smooth things out.
Back to top
 
 
  IP Logged
Gheorghe
Junior Member
**
Offline

SuzukiSavage.com
Rocks!

Posts: 88

Re: My trip down RYCA lane
Reply #3 - 07/31/13 at 10:26:17
 
By the way, all of the parts that are coming off the bike are for sale:
http://suzukisavage.com/cgi-bin/YaBB.pl?num=1370874839/0#0

So to continue smoothing things out, I got a little crazy with the wheel hubs as well. Most people will probably never notice this but the casting marks were bugging me and I figured that if I have the time (was still waiting for RYCA parts) and things will be powder coated, why not..

Front:


A little filing a little sanding and voila


Rear:


The material is all cast aluminum and is very soft so all the work is very easy, polishing might take a little more but the hubs are destined for powder so no need.
Back to top
 
 
  IP Logged
Gheorghe
Junior Member
**
Offline

SuzukiSavage.com
Rocks!

Posts: 88

Re: My trip down RYCA lane
Reply #4 - 07/31/13 at 11:33:26
 
So I continued to blow the bike apart for more preparation:

YEY!


The parts blanket getting full
Back to top
 
 
  IP Logged
LANCER
Serious Thumper
Alliance Member
*****
Offline

Savage Beast
Performance Parts

Posts: 10604
Oklahoma
Gender: male
Re: My trip down RYCA lane
Reply #5 - 07/31/13 at 13:30:44
 
I can see your first problem already; you are TOO organized.   Grin
Back to top
 
 
  IP Logged
WD
Serious Thumper
2005 No Login
*****
Offline

Professional
"scooter
trash".

Posts: 5207
Rosemark TN
Gender: male
Re: My trip down RYCA lane
Reply #6 - 07/31/13 at 14:14:05
 
LANCER wrote on 07/31/13 at 13:30:44:
I can see your first problem already; you are TOO organized.   Grin


You are supposed to work under a tree in the front yard. How else will you learn the "joy" of hunting little bitty rusty fasteners in grass, sand and gravel?

Wink
Back to top


On 2 wheels since 7/87

Black and Chrome 2003 1950s style custom
  IP Logged
Gheorghe
Junior Member
**
Offline

SuzukiSavage.com
Rocks!

Posts: 88

Re: My trip down RYCA lane
Reply #7 - 08/01/13 at 06:06:32
 
WD wrote on 07/31/13 at 14:14:05:
LANCER wrote on 07/31/13 at 13:30:44:
I can see your first problem already; you are TOO organized.   Grin


You are supposed to work under a tree in the front yard. How else will you learn the "joy" of hunting little bitty rusty fasteners in grass, sand and gravel?

Wink


HAHAHA, I am a bit OCD when it comes to cleanliness and organization even though my garage is nowhere as clean as it should be.

But let me tell you, the joys of having a little grommet or spring fly off in the stratosphere right out of your hand doesn't diminish when you are on concrete either. I can't tell you how many times my girlfriend or someone else would walk in the garage to find me on all fours in a corner staring at the ground  Shocked Shocked  "But…. But… I'm looking for the little widget!!!"  
Back to top
 
 
  IP Logged
Gheorghe
Junior Member
**
Offline

SuzukiSavage.com
Rocks!

Posts: 88

Re: My trip down RYCA lane
Reply #8 - 08/01/13 at 06:38:26
 
Electrical:

I wanted to run a very clean and efficient wiring / electrical system. That to me means no cutting things off just because I am eliminating a switch. What I wound up doing is actually pulling the entire harness apart and eliminating entire circuits. To some people this may seem like a hard job but if you take your time it really is not. The electrical system on these bikes if very simple and if you have the service manual it is even easier. The hardest part to me was un-taping the harness to expose the wires.


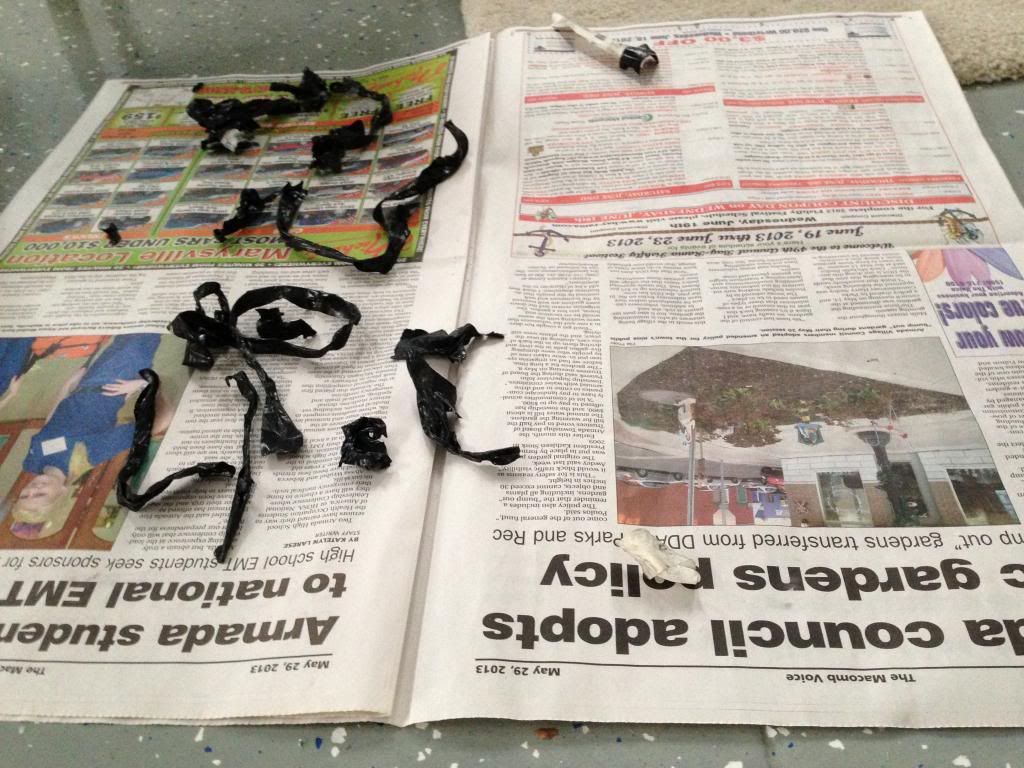
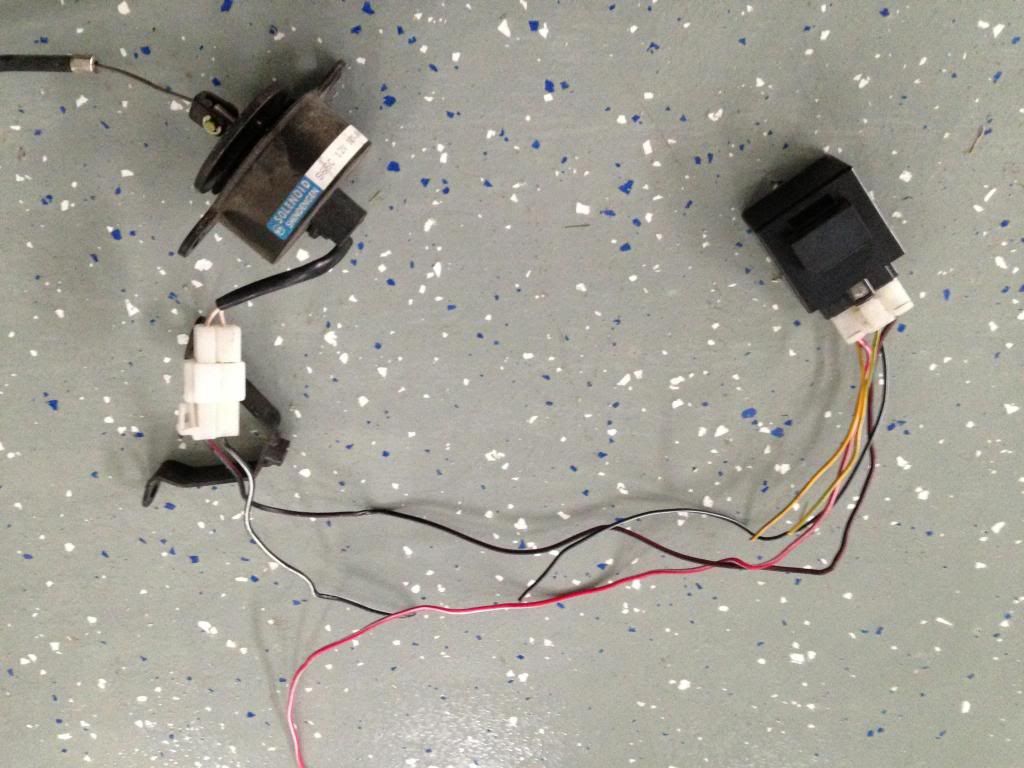
So the first thing was to eliminate the entire Decompression Solenoid along with the Solenoid Module and all of its wiring and connectors. To do this, and still be able to start the bike, you have to solder the power wire that would normally go in to the module to the rest of the starter system circuit, but again it is very easy once you see it in front of you, eliminating this system also eliminates one of the two 20Amp fuses in the system, this can be repurposed for a phone charger or GPS???? I didn't do anything with it Tongue.

This is the thing I wanted to eliminate,


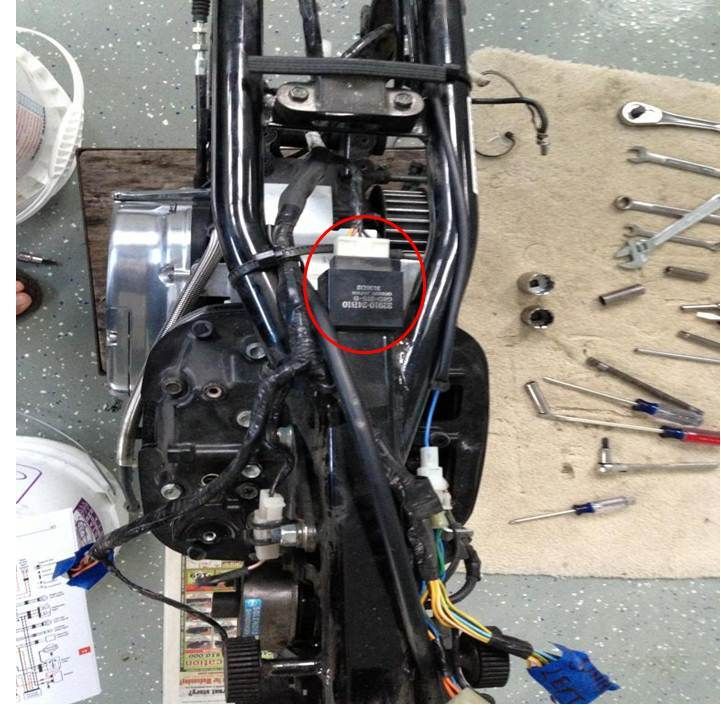
with a little work you wind up to this:
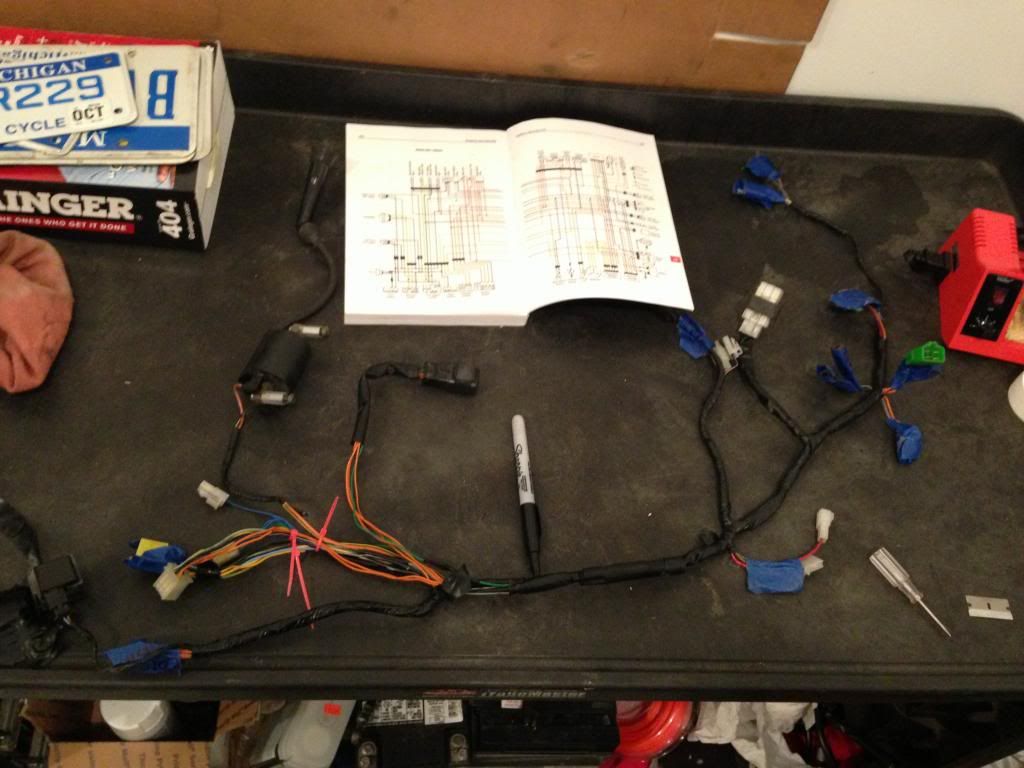
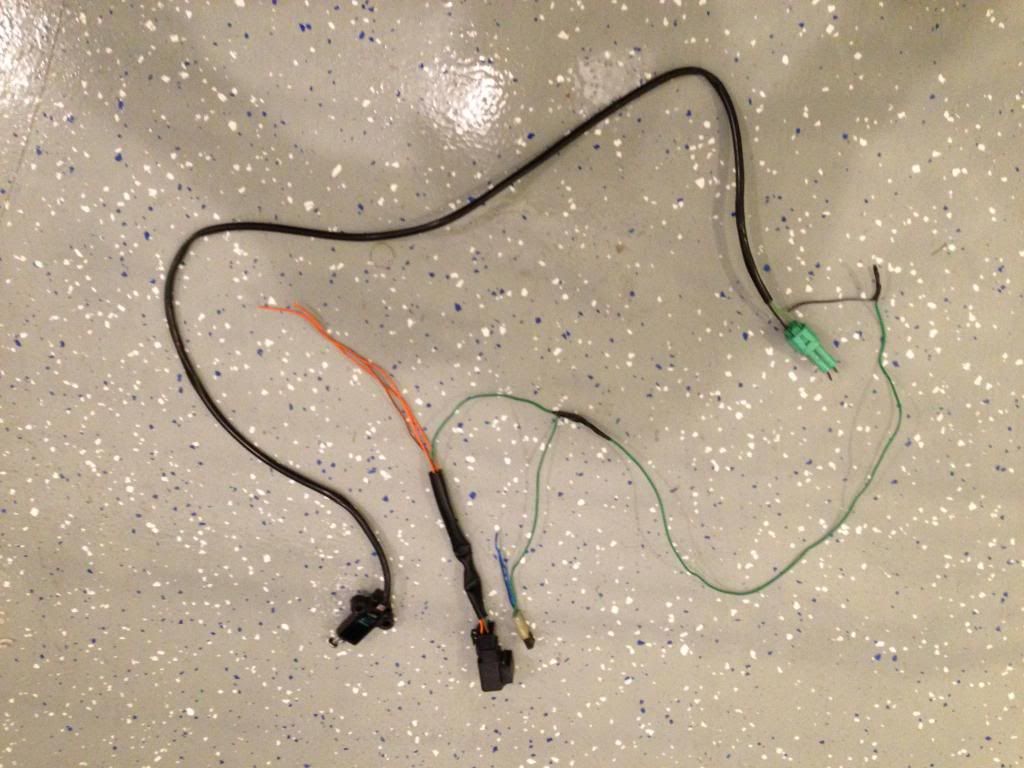

Then this:


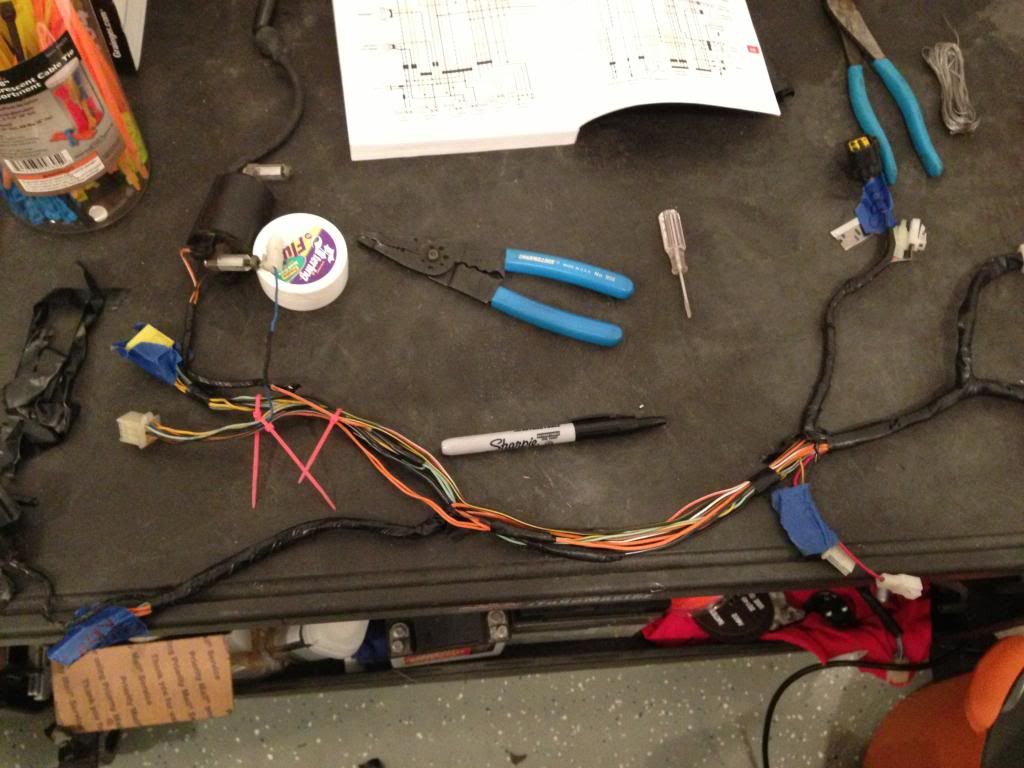
But I think it is much cleaner and in the end you pull out complete circuits that you do not need.

Decomp Circuit:


Side stand switch and circuit:
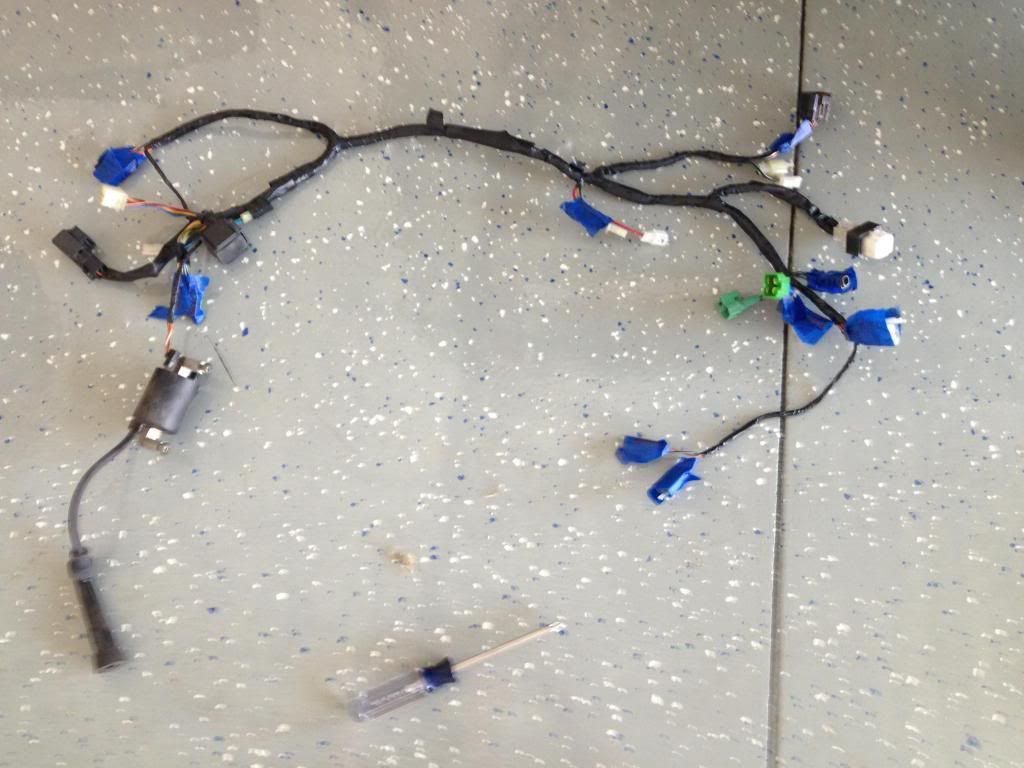

END RESULT Much cleaner and simpler.


Back to top
 
 
  IP Logged
Gheorghe
Junior Member
**
Offline

SuzukiSavage.com
Rocks!

Posts: 88

Re: My trip down RYCA lane
Reply #9 - 08/01/13 at 07:02:33
 
Swing Arm:
Another job I wanted to do on my own was to modify the swing arm. The two reasons for this were that I am running a Dunlop K70 tire so it is taller than 26" which equals a no  bueno for the swing arm clearance. The second is that I wanted to shave it completely smooth (including the passenger foot peg mounts.......both of them) more on the last later.
So here is me and my pops at the cutting table:


UH-ohhhh


Dunlop states that the diameter of their 4.00-18 rear tire (which is what I am running) is 26.73" so I put a little fudge factor in there and said that my tire will be 27.5" when all is said and done. Took half of that and measured from the axle (full forward position) to the swinger. Then I started cutting  Wink

Time to put it back together:


I have a friend that is a crazy good welder and he decided to get carried away with the shape of the swing arm. So in an afternoon, this is what we wound up with:


Finished result:[


I am very happy with it as I know it will be a lot stronger than before and to me, it looks killer.
Back to top
 
 
  IP Logged
Dave
YaBB Moderator
ModSquad
*****
Offline

SuzukiSavage.com
Rocks!

Posts: 17821
Camp Springs, Kentucky
Gender: male
Re: My trip down RYCA lane
Reply #10 - 08/01/13 at 10:01:50
 
You are well on your way - the fitting of parts takes a good bit of time but is very rewarding as it starts to look like a bike again.

Back to top
 
« Last Edit: 08/02/13 at 04:57:30 by Dave »  

Someday I will be old......But not today!

  IP Logged
Gheorghe
Junior Member
**
Offline

SuzukiSavage.com
Rocks!

Posts: 88

Re: My trip down RYCA lane
Reply #11 - 08/21/13 at 10:32:30
 
Frame cutting, I decided that since I am using the hand decomp lever, I no longer need the unused middle bracket on the left side of the bike........ so I took it off


No More  Grin


While I was cutting and grinding, I also decided to polish this little guy


Back to top
 
 
  IP Logged
Gheorghe
Junior Member
**
Offline

SuzukiSavage.com
Rocks!

Posts: 88

Re: My trip down RYCA lane
Reply #12 - 08/21/13 at 10:49:04
 
One other thing that I copied from Rpnsht was the top triple, I didn't want to have the holes from the handlebar isolators left in so a little machining and care took care of them....

One thing to note, if anyone cares, is the triple is made of the main piece and two small collars that are pressed in to it from the top to form the isolator mounting area for the handle bars. Those collars can be pressed out, here is what I mean, top of triple with top collars pressed out:


And done:

I still wanted to mount the gauges in the same location so the plugs that were used to fill the holes had blind holes drilled on the bottom and tapped to 10mm


Also, to have a belt and suspenders approach to the triple, a small roll pin was drilled and pressed on the bottom through each plug. Sorry for the blurry pic but the black dot is the roll pin that goes through the plug, it is drilled in the remaining lip on the bottom of what used to be the isolator hole. The picture tells the story.
Back to top
 
« Last Edit: 08/22/13 at 07:39:03 by Gheorghe »  
  IP Logged
Gheorghe
Junior Member
**
Offline

SuzukiSavage.com
Rocks!

Posts: 88

Re: My trip down RYCA lane
Reply #13 - 08/21/13 at 11:01:13
 
June 12th: this showed up


Yup, entire RYCA kit. Thanks to RYCA for being a cool company and for the quick turn around. Ryan is super cool to deal with.

If anyone was interested in seeing the exact differences between the tanks, here is a before and after RYCA treatment:


After:


I will be using a "pop up" gas cap so the entire origianl gas cap will be cut out and a new bung will be welded in
Back to top
 
« Last Edit: 08/22/13 at 07:41:38 by Gheorghe »  
  IP Logged
Gheorghe
Junior Member
**
Offline

SuzukiSavage.com
Rocks!

Posts: 88

Re: My trip down RYCA lane
Reply #14 - 08/21/13 at 11:10:46
 
The only way to make a bike nice and clean is to take care of the little things, what I mean by that.........Powder Coat!!! I live very close to, what I consider to be a very good powder coating and ceramic coating facility---------QC Coatings. A bunch of cool guys whom love anything automotive, if you live in Michigan and want something done right, I cannot recommend these guys enough.
I dropped off 13 pieces:
The switch control housings (4 individual pieces)
Front hub
Rear Hub
Clutch Perch
Clutch lever
Brake Lever
Frame
Swing arm
Upper and lower tripples


This is what came out.....Black and shiny


Back to top
 
 
  IP Logged
Pages: 1 2 3 4
Send Topic Print


« Home

 
« Home
SuzukiSavage.com
05/06/24 at 09:14:18


General CategoryRubber Side Down! › My trip down RYCA lane


SuzukiSavage.com » Powered by YaBB 2.2!
YaBB © 2000-2007. All Rights Reserved.