Note: Please post questions in the Rubberside or PM me...The Harley "Shorty" muffler is the most popular muffler swap for the Savage.
It gives a slightly louder, much deeper tone,... looks great,... and saves 7 lbs over the stock unit. The chrome finish is top quality, and the swap is fairly easy...
Providing you select the right Harley muffler...
This is a guide to point you in right direction...
Quote:Note... Some mufflers may be sold with the center baffle knocked out, (this essentially makes it a straight pipe),... so ask the seller, or check it yourself... (you can insert a stick into the muffler and feel the baffle plate blocking passage near the center of the muffler..)( or look down the tube with a flashlight)...
Quote:All the Harley short mufflers are internally the same, with the exception of some having a sort of heating coil at the front, which seems to make little difference to sound or flow. They are probably California models, and are stamped on the side as "Catalytic".
Externally,...
...they all mount very different...
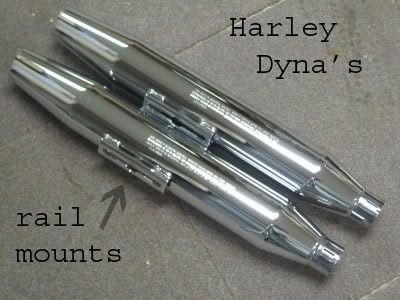
The easiest swap is with the "Dyna" model.
This is the one you want, if you can find it. 
...
It's "rail mount" will bolt right up to the original muffler bracket.
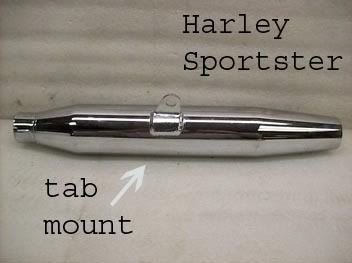
Second place goes to the Pre-04' Sportster muffler.
It is a "tab mount",... and will likely require slightly bending the tab (use a rubber mallet) and drilling a new bolt hole in the muffler bracket.
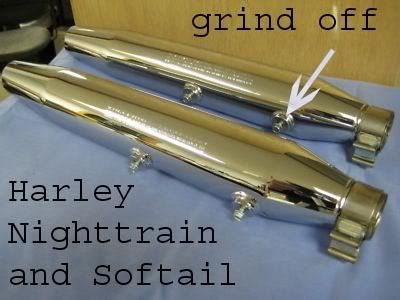
Third place,... Is the Harley Softail/ Nightrain muffler. It has two protruding bolts,... the end one lines up with the stock Savage mount, the other must be ground off...
This muffler is a new find, and may be better or equal to the Sportster.... (Thanks to Boofer)...
Lastly, is any other Harley mounting system. Not really recommended, but... if you find one for a price you can't refuse (like free!),... you can make anything fit one way or another.
...and internally you will get the same.
Screaming Eagle's and other aftermarket Harley clone mufflers are usually much louder, and the build quality on some of these may not be as good. But,.. if you want louder, they are out there.
A good price on a Harley shorty is anywhere from free to $30.00. They are thrown away at dealerships and are known as "cast-offs".
So,... you definitely don't want to pay a lot.
Do a search on E-Bay any day and you'll find dozens...
Problem is,... many sellers don't know what they came off, and some will mislabel them as for the wrong bike.
So,
study the pictures.

...
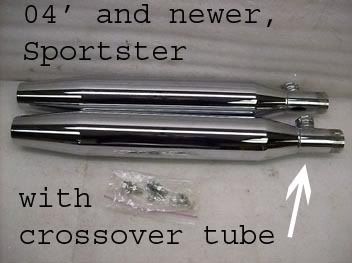
Now,... for the one you don't want...
It's the newer model's with a crossover tube at the front. If you get one of these, you will have to plug that tube, and live with the ugly thing sticking out there. So stay away from them.

Good luck,.. happy hunting...

...
...and now for some installation tips...Since each type connects a little different to the mount bracket, and these have been described in the above section,...
...let's concentrate on the front pipe mount.
All the Harley pipes are slightly larger in diameter than our stock pipe.
If you can save the old gasket intact, (usually it gets boogered), you might possibly use it to help fill the space.
I use a bit of tin can... (reports are, aluminum works, too)...
Quote:NOTE... Wear gloves, like I didn't,... or you'll surely get cut, like I did...

...
Cut a strip with some tin snips... the wavy part helps make a nice crush seal...
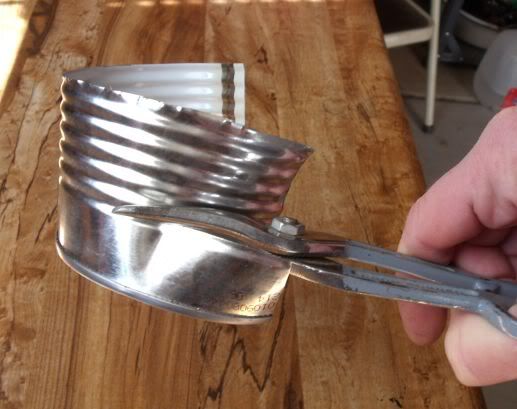
Cutting a diagonal on the ends helps the seal too...
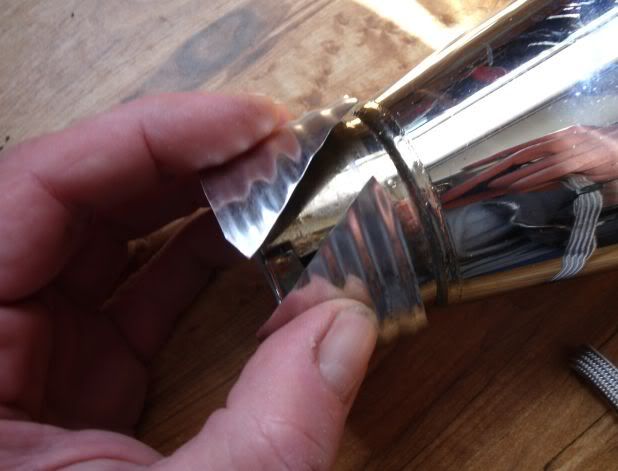
nice fit...
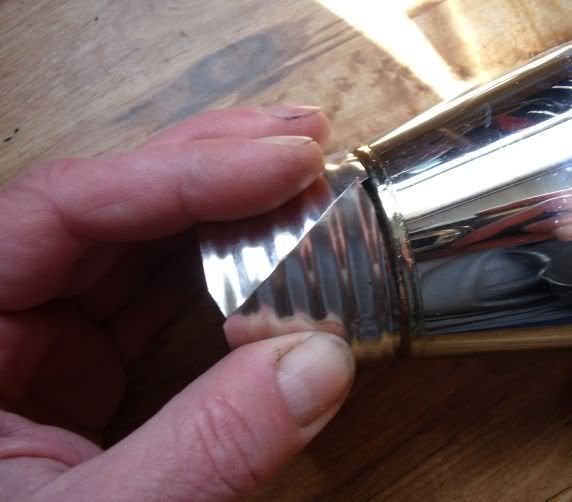
use a wide , sturdy clamp... (Harley makes one,.. I found this one at a dollar store)... shop around...
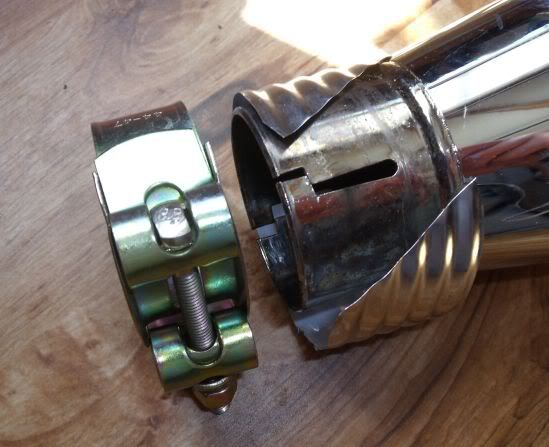
Cutting a series of slots in the end of the muffler will allow the clamp to neck down the muffler to the pipe diameter...
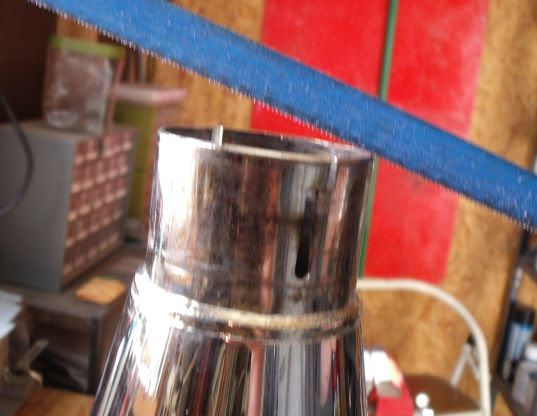
I usually make about six or eight slots,...
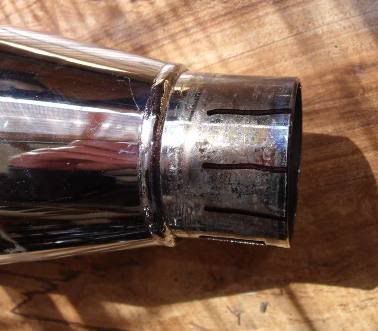
...like so...
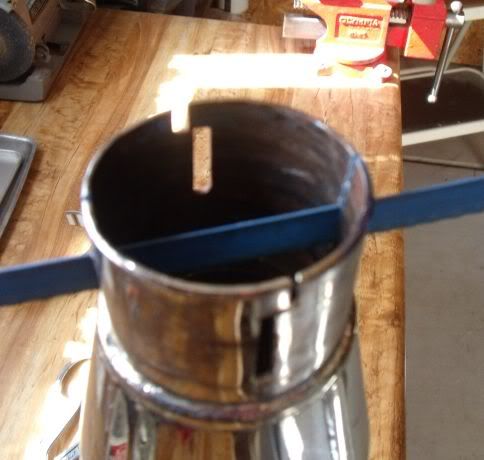
Now that you have all your parts together and prepped, you are ready to install...
It's best to disconnect the exhaust pipe at the cylinder head, so you don't put strain on the exhaust gasket up there...
If you loosen the two chrome nuts that hold the right footpeg and muffler guard, you can have more wiggle room... but you don't have to...
Slide the clamp onto the pipe, up past the end as far as you can, then wrap the tin gasket around the end of the pipe.
Get the muffler over the gasket and pipe, and slide it home...
Now,... attach the muffler to the bracket, (using whichever method applies to the type of muffler you bought)...
Once you have that secured, go to the front and re-attach the exhaust pipe at the head. (use some anti-seize on those bolts if have any)...
Now that the front end and the rear end are aligned and secured, clamp the muffler to the pipe. Any slight miss-alignment will kinda' bend out as the clamp cinches down...
You can buy a chrome cover shield to hide the clamp area if you want. Harley sells one, as do others ($10 to $20)... they usually attach with hose clamps....
Re-attach your footpeg and heat guard, (making sure the brake return spring is positioned)...
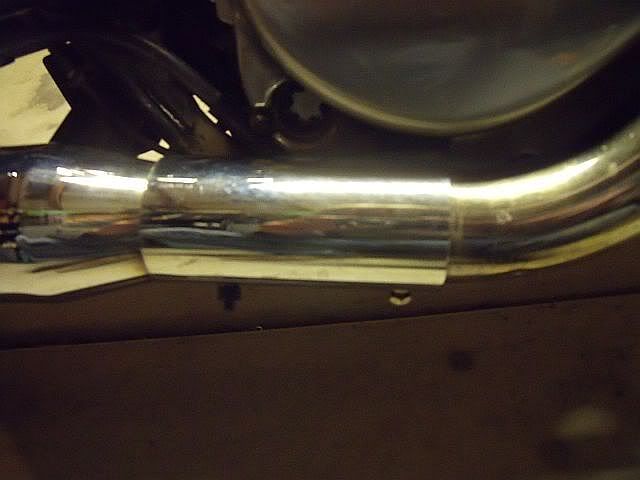
Here's a pic of the muffler/pipe connection... notice, the muffler butts up right to the heavy ring of the pipe...
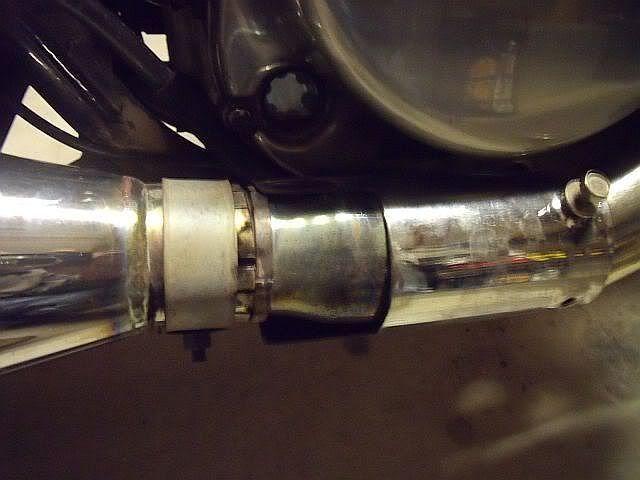
... and one of the same, with the cover in place...
... and you are ready to ride...

...
(Well,... clean up your mess first)...

...
Listen to that purrr!...
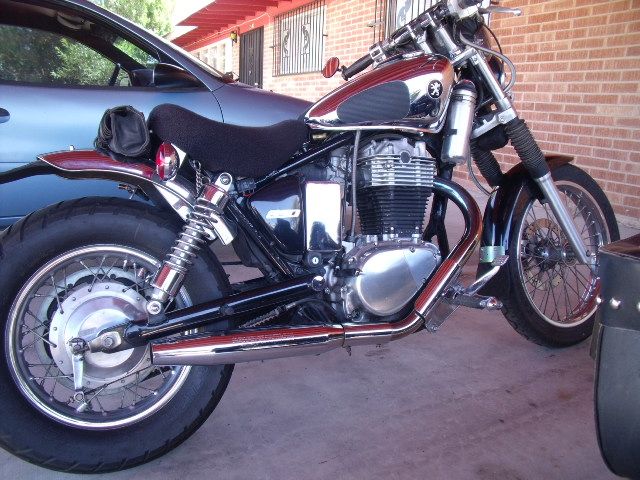
Here's a finished look...
***Note... some other members have had a muffler shop make an adapter with a 10' offset angle, and necked down at one end to adapt the mufflers to the pipe... This has the advantage of putting the muffler out past the brake lever on the rear hub, and not sooting it up...
On the other hand,... you are on your own with attaching the muffler to the bracket in this case,... because it will be dependent on the length and contour of the adapter pipe... and it will require two
clamps and a more sophisticated heat shield to cover the joint...
... but, you might want to study the option, and see if it will be more suitable for your application.
*** Note... for best performance, you will likely need to rejet.
One or two steps higher on the main, and do a 2/3 thickness mad to the needle jet spacer...
Actual amount will vary, depending on your elevation, humidity temps, other mods (air filter), and riding style...
Generally speaking... if you are riding at less than 3,000ft elevation... a change to a 150/50# main/pilot and 2/3 thickness spacer will not hurt... (the spacer mod is optional, and will mostly affect acceleration)...

