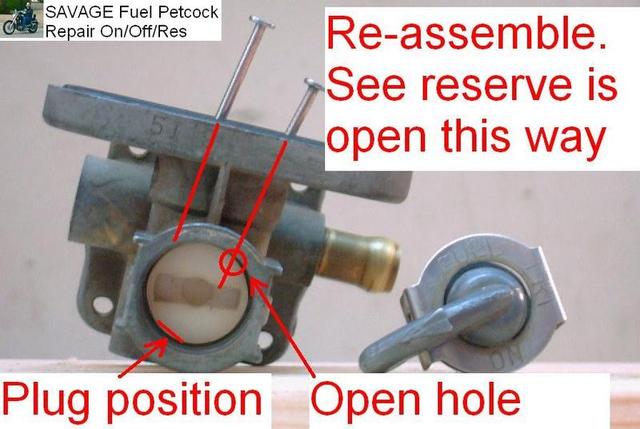
With the "PRI" hole plugged in the white plastic valve, we now line up the plastic valve so the remaining bigger hole lines up with the fuel inlets. In these pics, I turned the selector lever to match the plastic valve position. and finally installed the lever by the third photo. I used nails and red lines to show where the hole lines up, as I could not photo it adequately. You, however, can see how the hole lines up by looking down the top of the petc0ck with good lighting. You don't need no stinking nails.
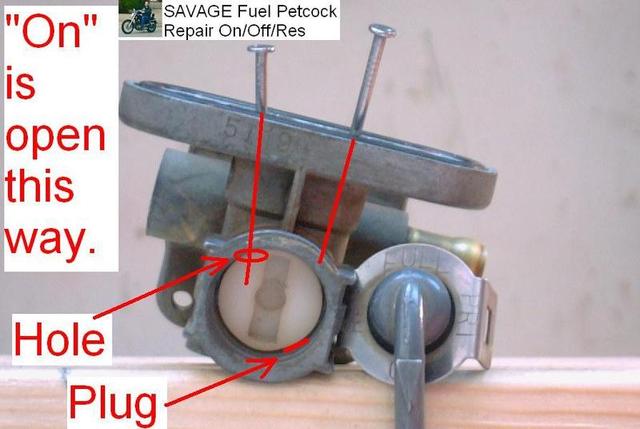
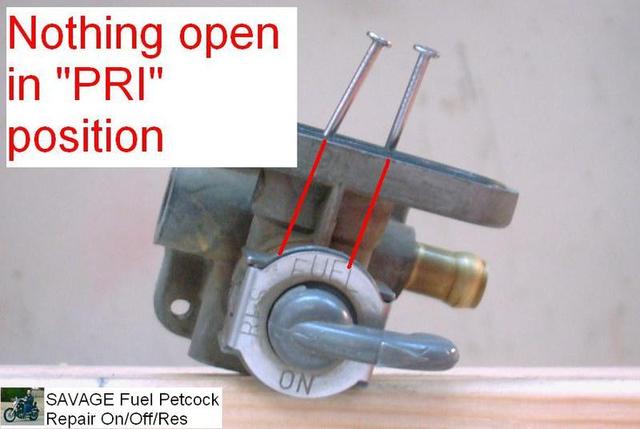
At this point you can admire your handywork as the plug is visible from the top of the petc0ck when the lever is in
"PRI" oops now it's "OFF". Better make a label for that... Put the back cover & gasket on, RTV sealer optional, cap the vacuum port, and re-install the fuel inlet tube recalling how the tubes have different lengths to match the depths of the inlets on the petc0ck. DO NOT PUSH ON THE TOP OF THE PLASTIC INLET TUBE - YOU WILL BEND OR BREAK IT! Push on the base only, and use that little screwdriver your pried it off with:
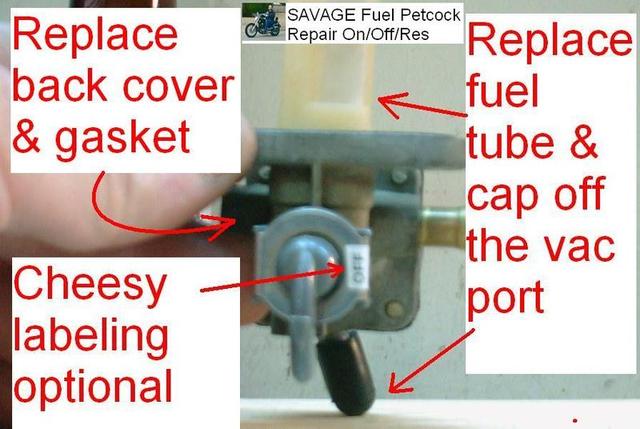
[glow=red,2,300]BE SURE TO CAP OFF THE VACUUM PORT ON THE CARBURETOR THAT USED TO RUN THE PETC0CK! [/glow]
You are now DONE and ready to put your manual work inducing misery whip back on the bike, fill the tank, and watch for leaks.
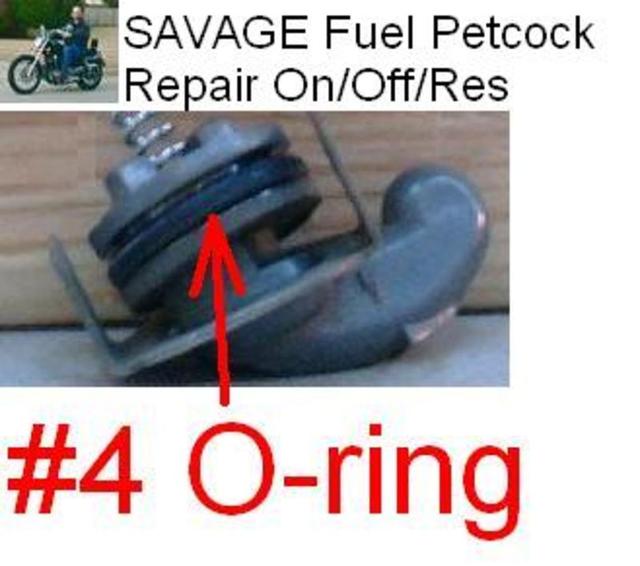
You may get a leak around the lever, since we disturbed that O-ring. If you do, replace the O-ring. Go to the hardware store and get a
#4 O-ring out of the fauct parts section (around plumbing and the new faucets). At least here in Arlington at Lowe's it was marked as a #4, but take the old one with you to make sure. Things get messed up in those big stores and most of the employees are too overworked to care about fixing it. The #4 is a perfect fit and stopped my leak.
RTV Silicone can help seal the petc0ck body to the tank if need be, further enraging the pretty boys who called you a hack for doing this conversion.
Let me know if you have any further questions.[glow=red,2,300] [/glow]

 Pages: 1

