Okay, so I've been on this mad mission of making a new seat cover for my 1996 Savage. It's been, starting to come apart at the seams and with a road trip (fingers crossed) coming up, I didn't want to have to deal with that. But I didn't want to do the standard 'stretch fabric over and staple it in' look. I'm rather fond of that piece of pipe that runs around the circumference of the seat I guess lol. So I wanted to recreate as many as the factory seams as I could. And new to the forum, I really wanted to try to contribute something because I've been lurking for so long absorbing everything else people have been saying.
So with that, I submit: How to recreate a stock(ish) seat cover VERSION ONE with downloadable and printable sewing templates. Also, did I mention it's about $15 worth of material?
First off, here is what the finished product looks like so you can decide if this is worth continuing to read:
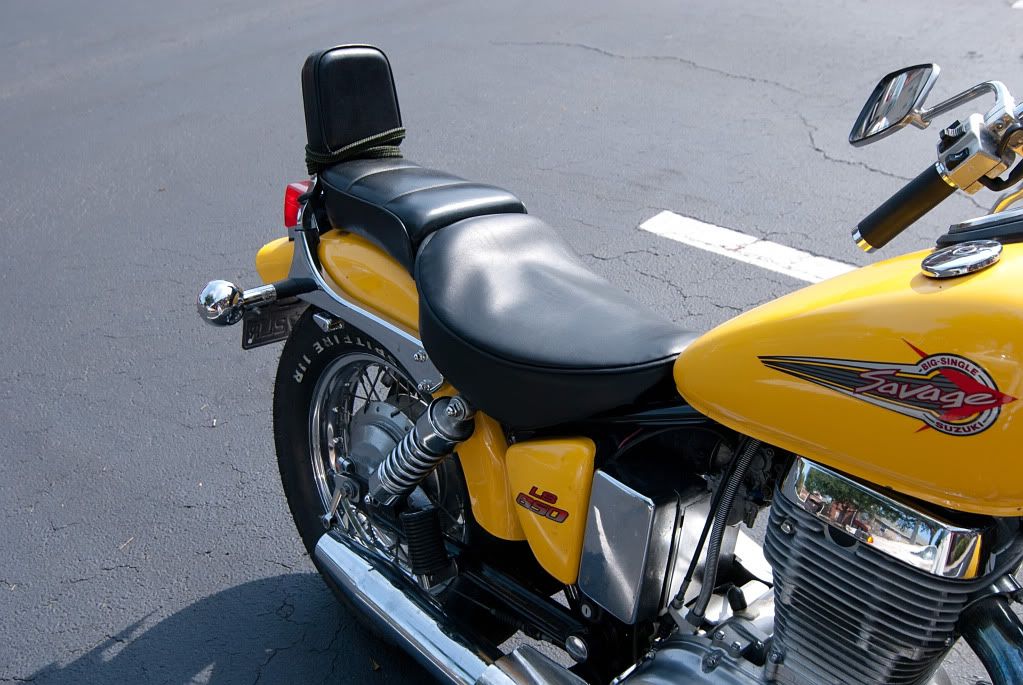
There ya have it.
Materials used:
- The template attached to this post
- Black Marine Vinyl (1 yard used, but go for two just incase you want to try again)
- Black Dual Duty Heavyweight Thread
I chose to use the marine vinyl because it was made for being outdoors and waterproof and junk. Would I use it again? Holy heck it's thick. Kind'a hard to work with, but you can make it happen. It's certainly tough. Doesn't quite match the rest of the seat material, but it's close.
Let's get down to business:
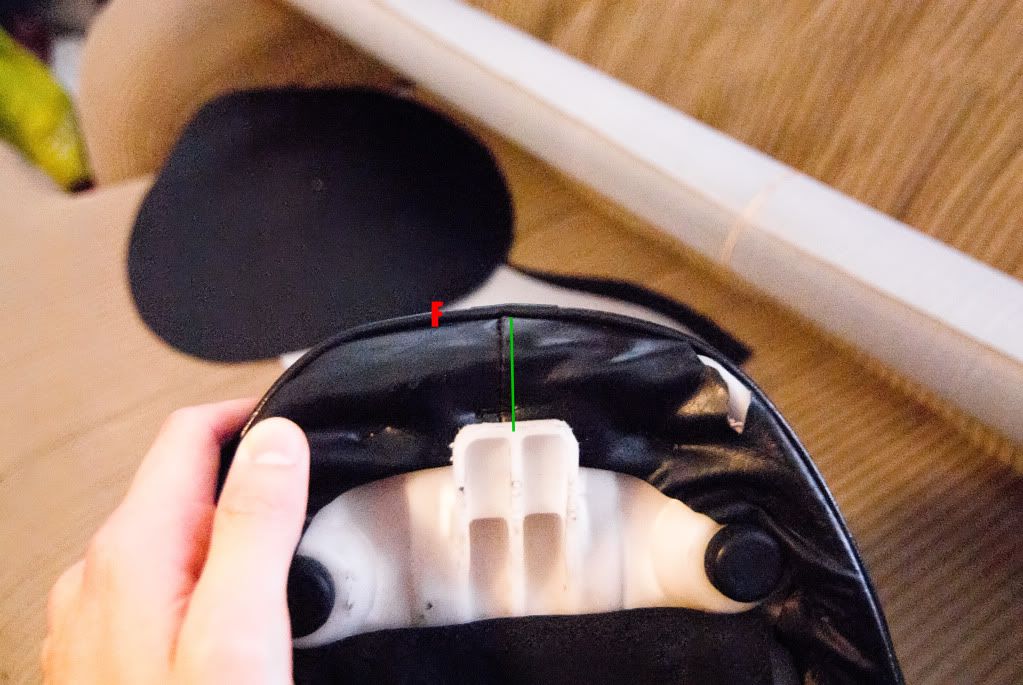
Step One: Study the seats
The old tired seat:

Well, we have a few seams, and the pipe to recreate. (in this version I skipped the seams on the top of the seat. They will be noted in version two when I can make that).
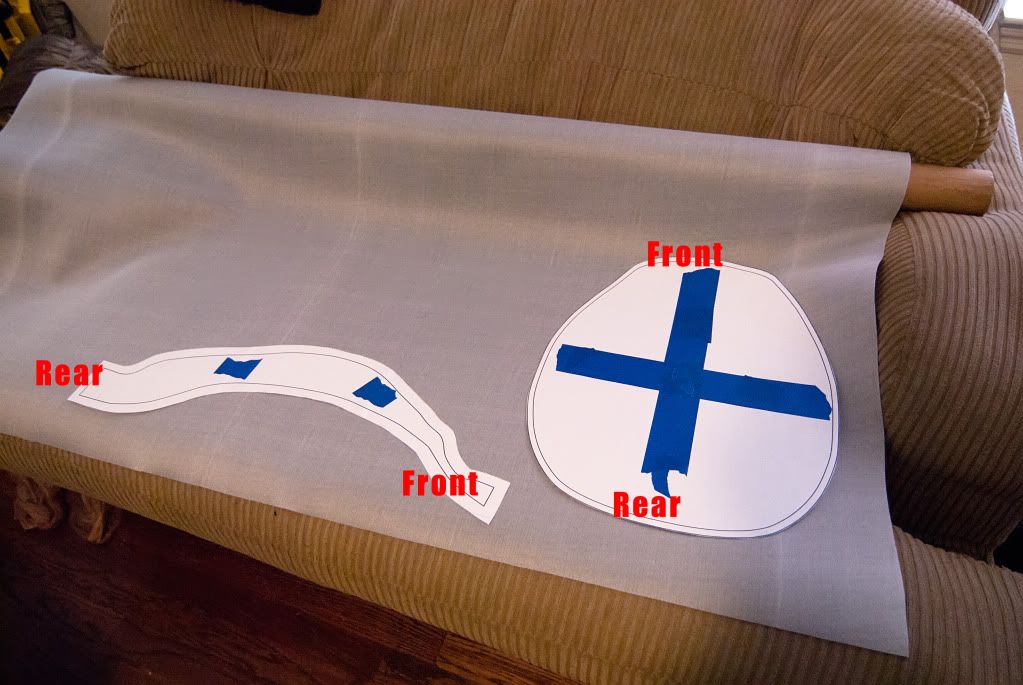
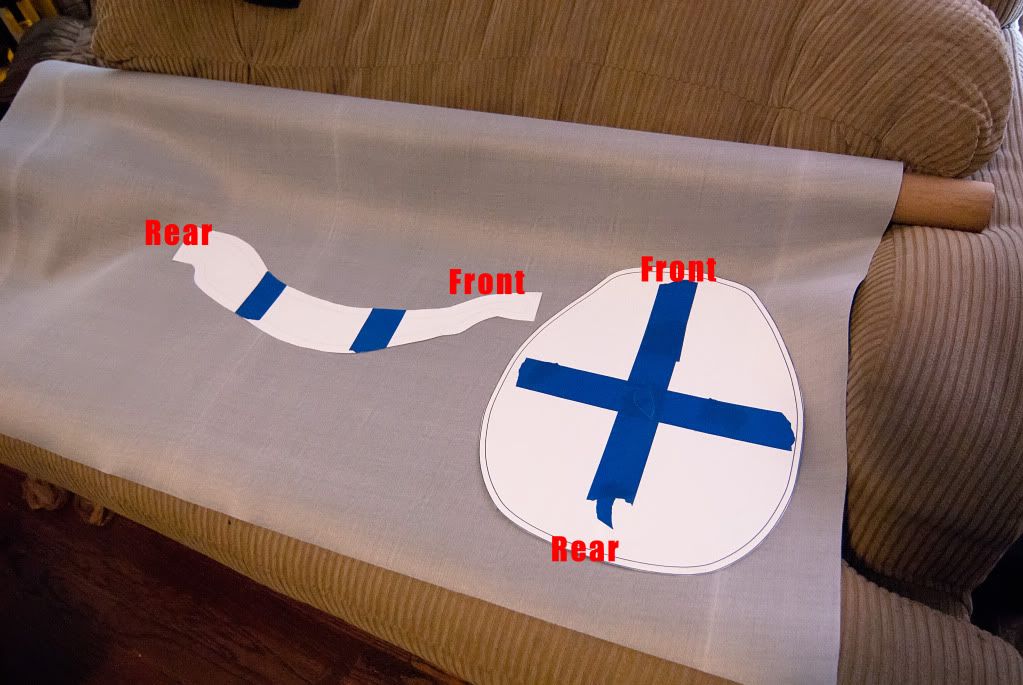
The seams: (Seams are color coded to show relationships.)
Front seam:
Rear seam:
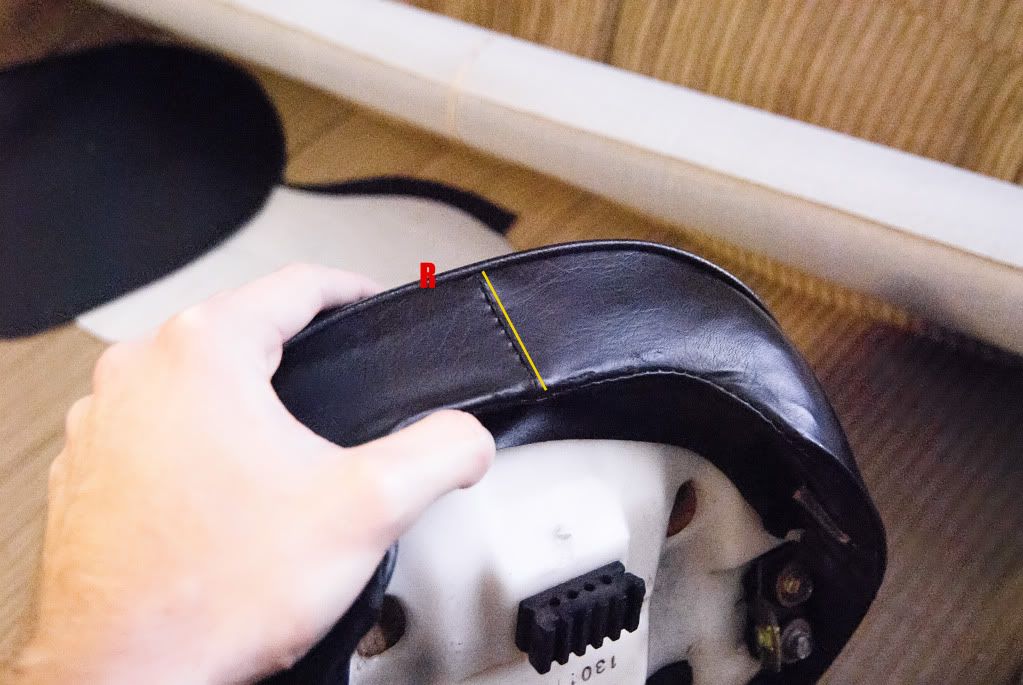
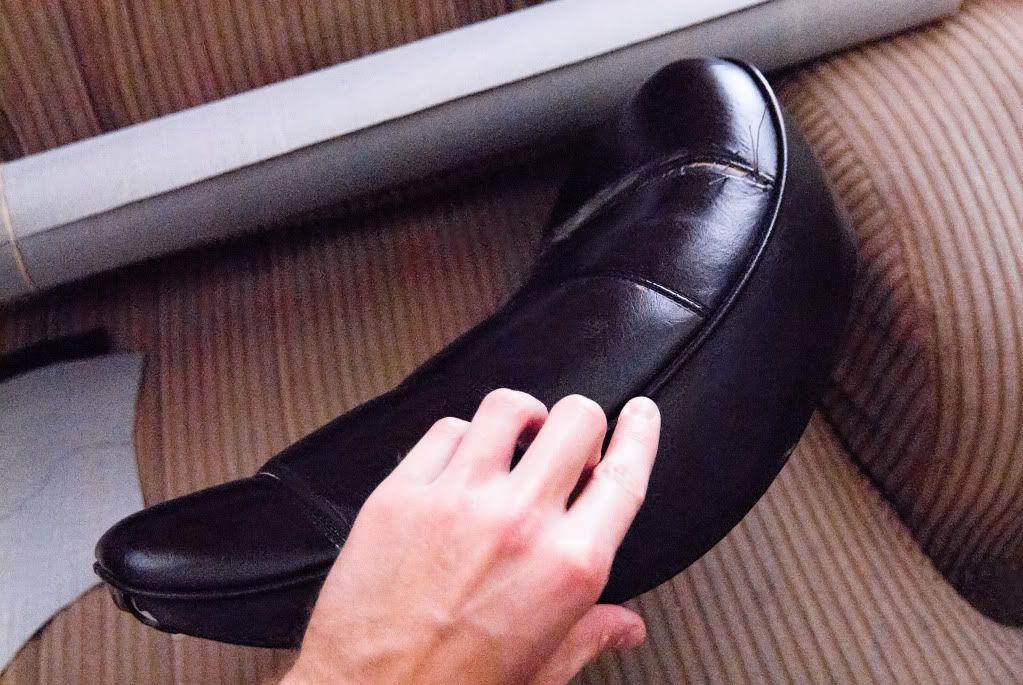
Pipe:
Step Two: Cut and print the templates
The templates are larger than a sheet of paper so you will have to do a multi-page print. The templates are in the standard .pdf format. When you got to print them and the print options box pops up, instead of the default 'fit to page' option, select 'tile multiple pages'. Also check the boxes for labels and cut marks. Hit print, cut along the cut marks, and assemble them with masking tape. After they are taped, cut the templates out.
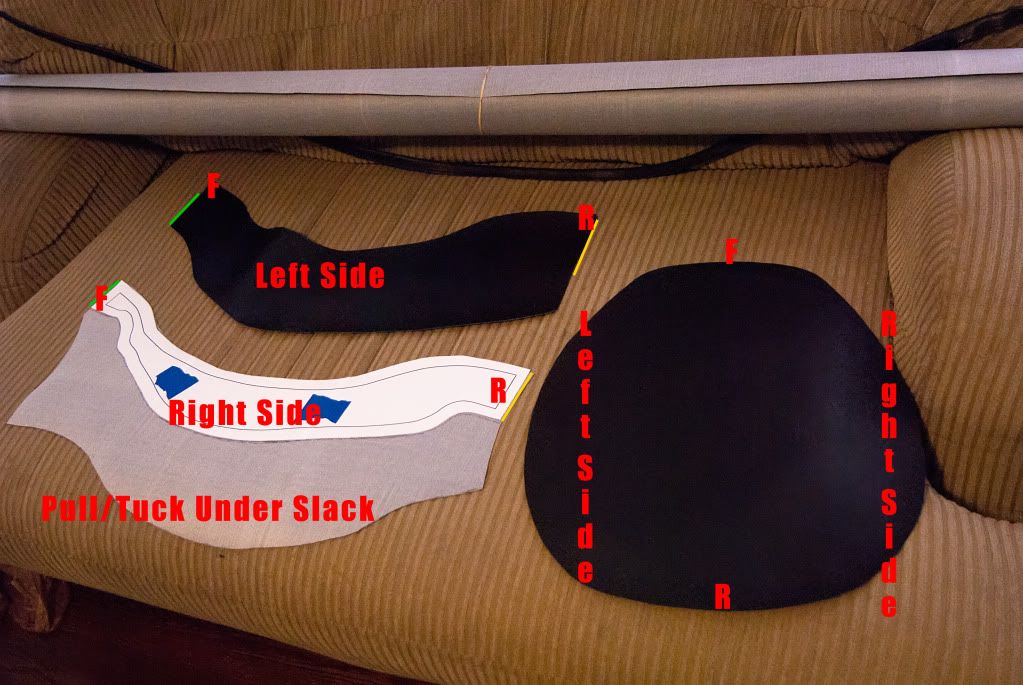
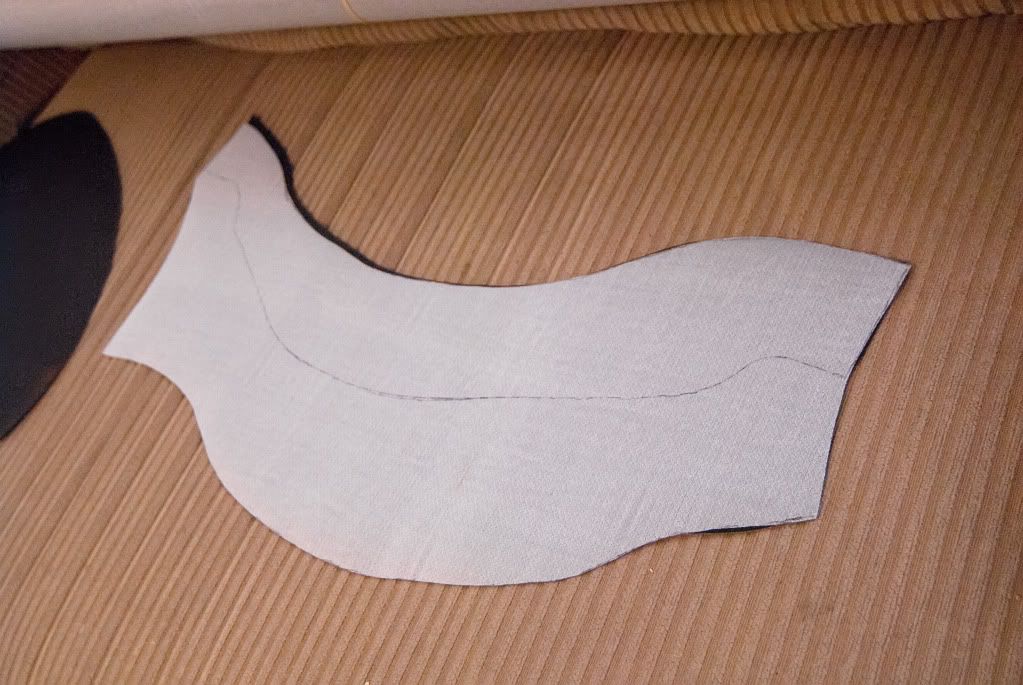
Tracing Templates:
Flip over the other side template and trace again to get the other side of the seat:
The templates have two lines you will see. The inner line is where the thread is to be sewn, and the outer line is the slack you should leave to make them sewable on a machine (this is the line you cut on). Pretty much, just shoot for about a half an inch around the inner object and you are good to go. The only place the half in rule doesn't apply is on the bottom of the side pieces. Here you will want to leave about an extra 4-5 inches so you have stuff to pull under and staple down. I just kind'a doubled the shape.
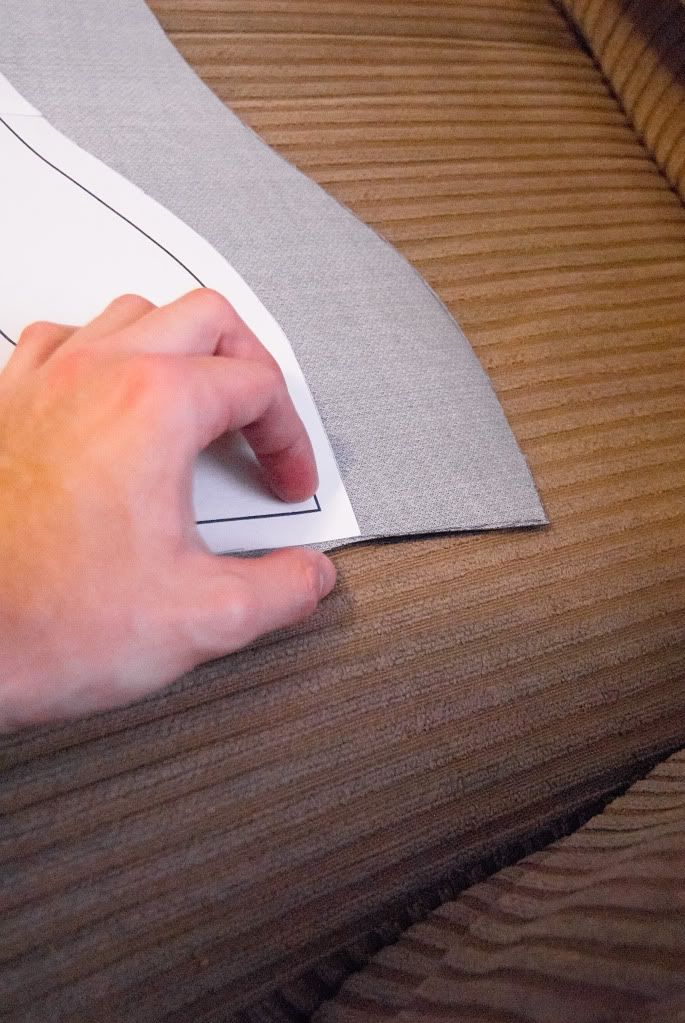
Showing the extra slack below each side shape:
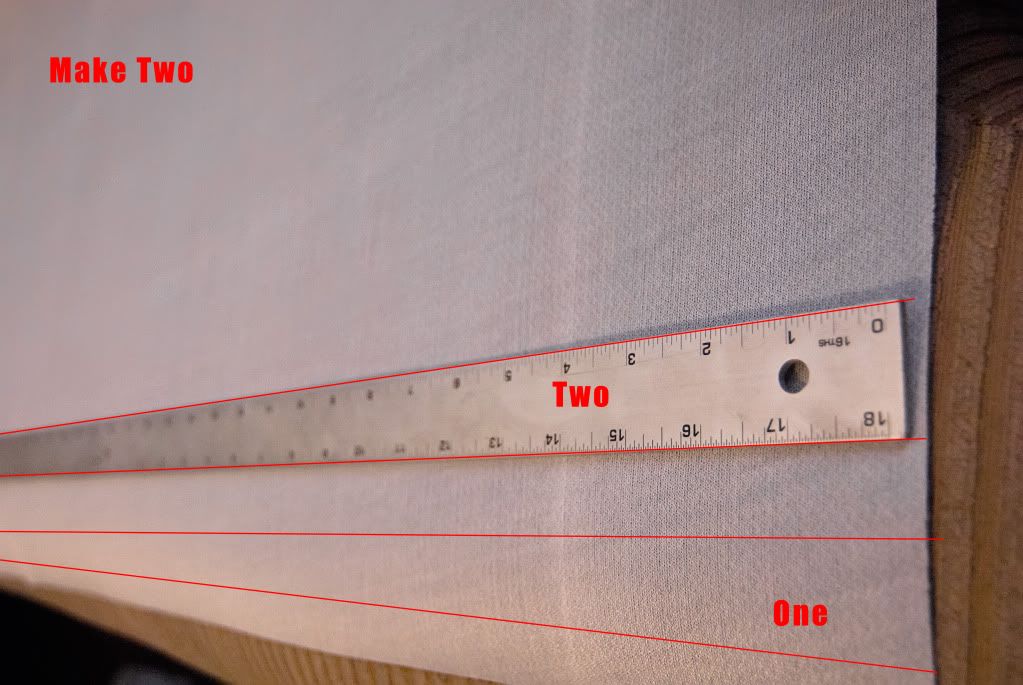
Now, there is special stuff to create the decorative pipe. Special stuff costs money, so we will just fake it. Take a yard stick, lay it on your fabric, and trace either side of it all the way down the width of your fabric sheet. My fabric sheet is 54 inches wide; my yard stick is 36 inches long. So you'll have to do a little more than half, and then move it down and do the rest. My yard stick is just over an inch wide. It works out good to make two of these ribbon things. Yes, make two of these. You'll see why soon.
Tracing the yardsticks to make the ribbon cut things for recreating the pipes:
Awesome, now you got everything you need to put this thing together.
This picture again:
Step Three: Make the pipe edging
This is basically the idea behind making the pipe edging:
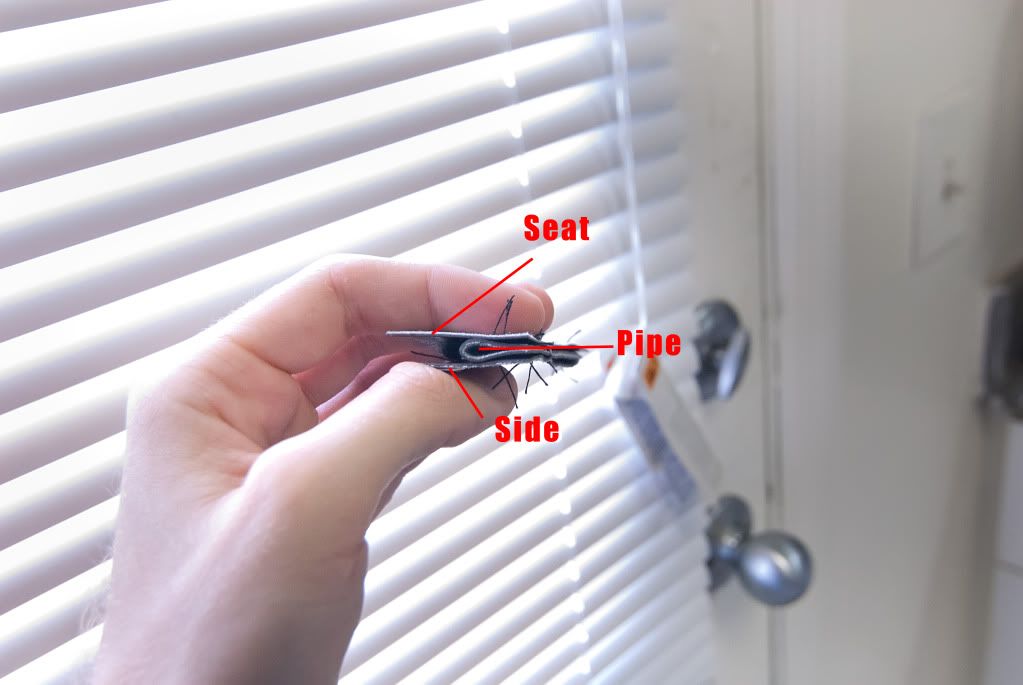
Pretty much, its the folded over piece of fabric in the middle of two other pieces. Remember, the pipe edging is going to be formed from the ribbon like things you cut out.
This is what it looks like unfolded:
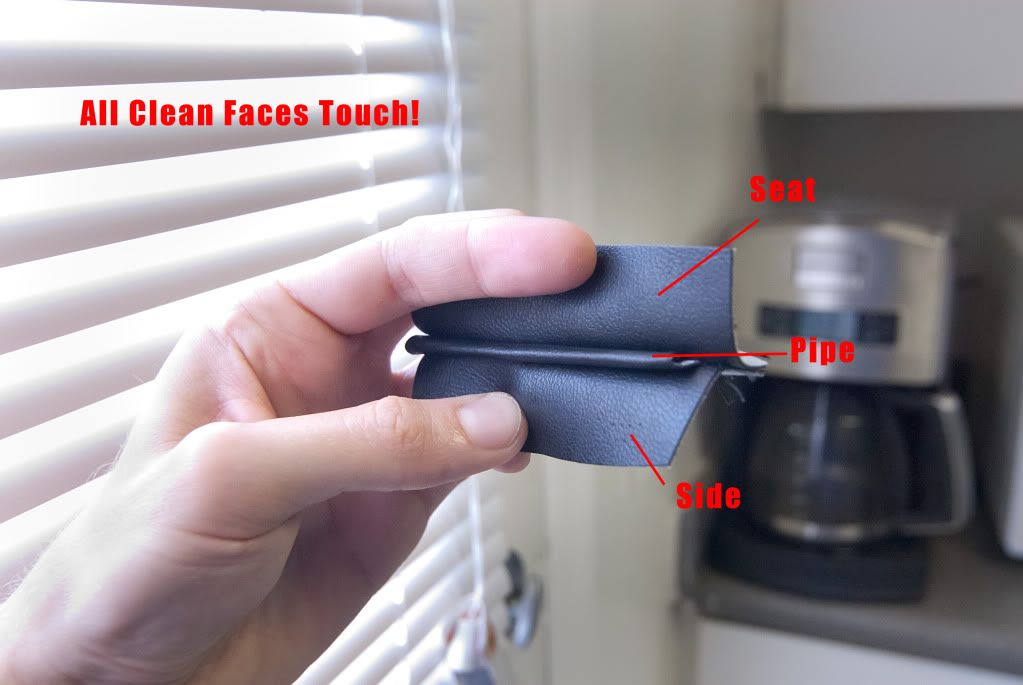
See how the pipe takes form in there? It is important to note that when you are assembling this, all the clean faces are butted up against each other. If you don't have them like that, when you unfold it, you are gonna get the ugly side of the fabric in there somewhere.
Anyway, still wondering why you cut two pieces? Pretty much, one folded piece of fabric to create the pipe results in a fairly flat and boring edge. It needs to be thicker. We will be taking the second ribbon, and sandwiching it in between to build it up!
Insert ribbon one, into ribbon two:
Now, keeping that together and sewing all the other layers to it will be a pain. So you'll want to sew this piece up right now. Just push it through your sewing machine with some basic long stitch to hold it together.
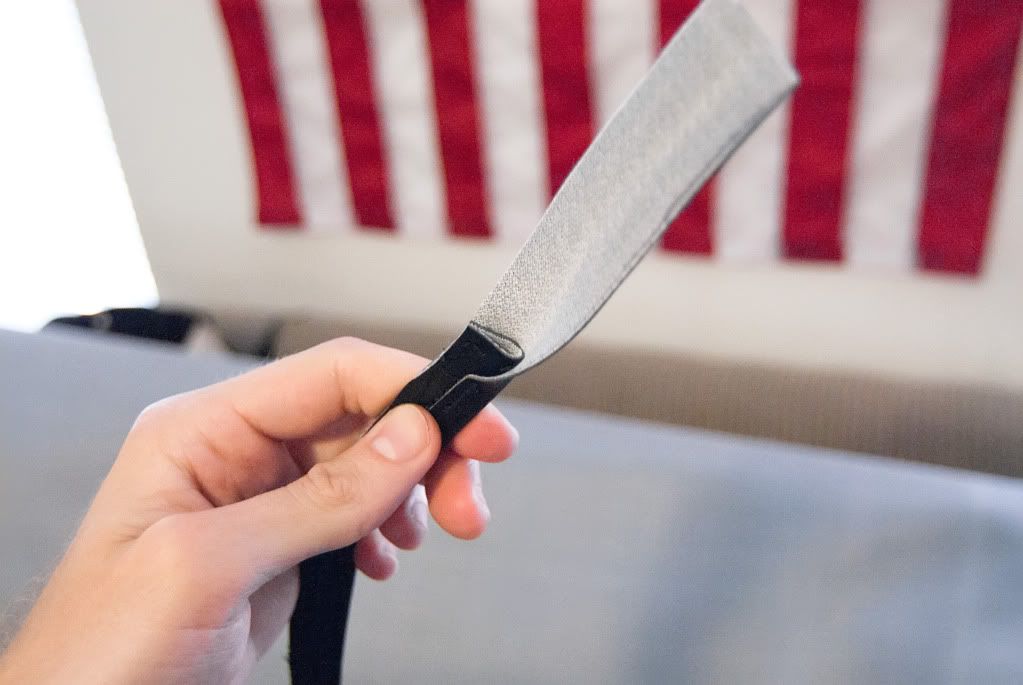
Sewn up double thick pipe:
You'll want to keep the thread kind'a in the middle of the pipe. If you sew it near the end that shows, you may see it in the finished seat which will make everything look bad. But you also don't want to sew it far on the rough edge. This is because we need to trim it up now.
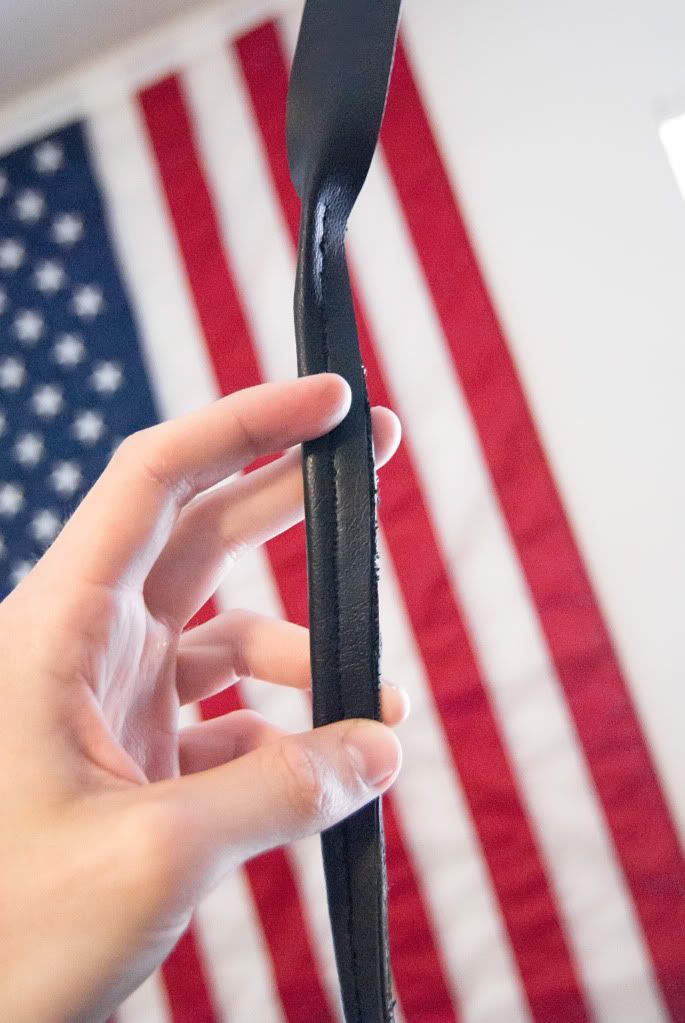
Trim up your pipe:
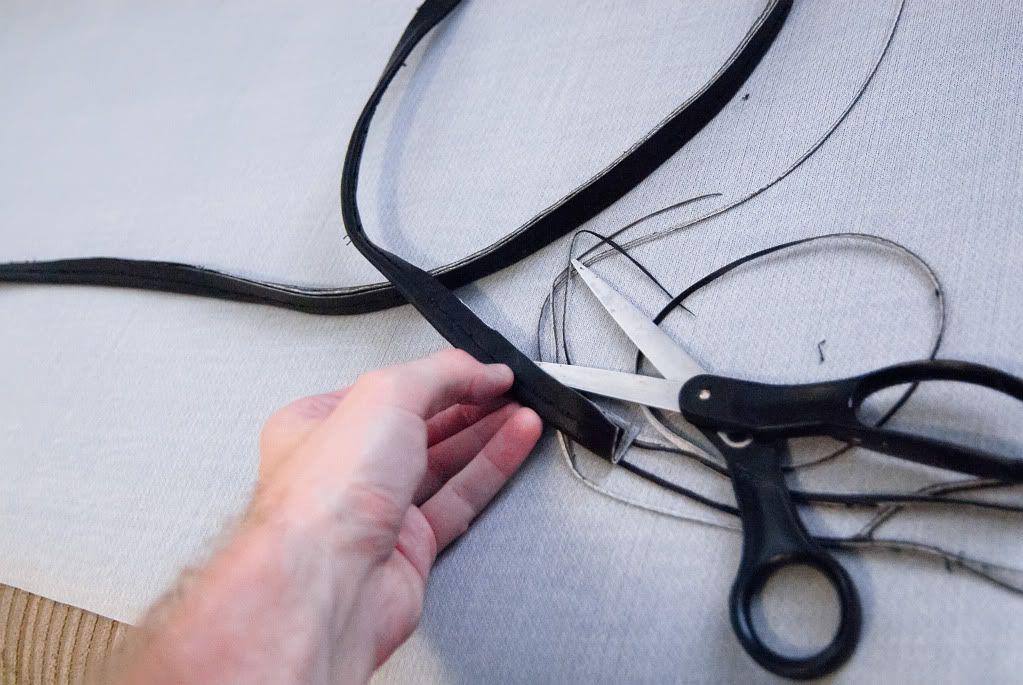
The two pieces inside each other will not fold to even edges. Trim up the rough edge so it is even all the way down the length of the pipe. I shot for making the whole thing about half an inch thick. It is important to have a consistent width because you'll be using the rough edge as a guide while on your sewing machine.
Step 4: Getting the main sewing action on
Okay, its rather hard to sew and shoot at the same time. But, hopefully these pix will help.
First off, remember those templates?
Don't forget you want to lay your stitch about a half inch inside!
The inner outline where you put your stitching!
You have the option of pretending its there when you sew (I just imagined it and used The Force to guide me. Also, the presser foot on my sewing machine is about a half inch wide.... so it kind'a automatically lined up) or you can cut out the templates again to the inner outline, stick the templates in the middle of your fabric, and trace the inner outline to have as a visual. I'm more fond of just winging it though =P
Next up is layering! Don't screw this part up!!!!
How you want to layer everything:
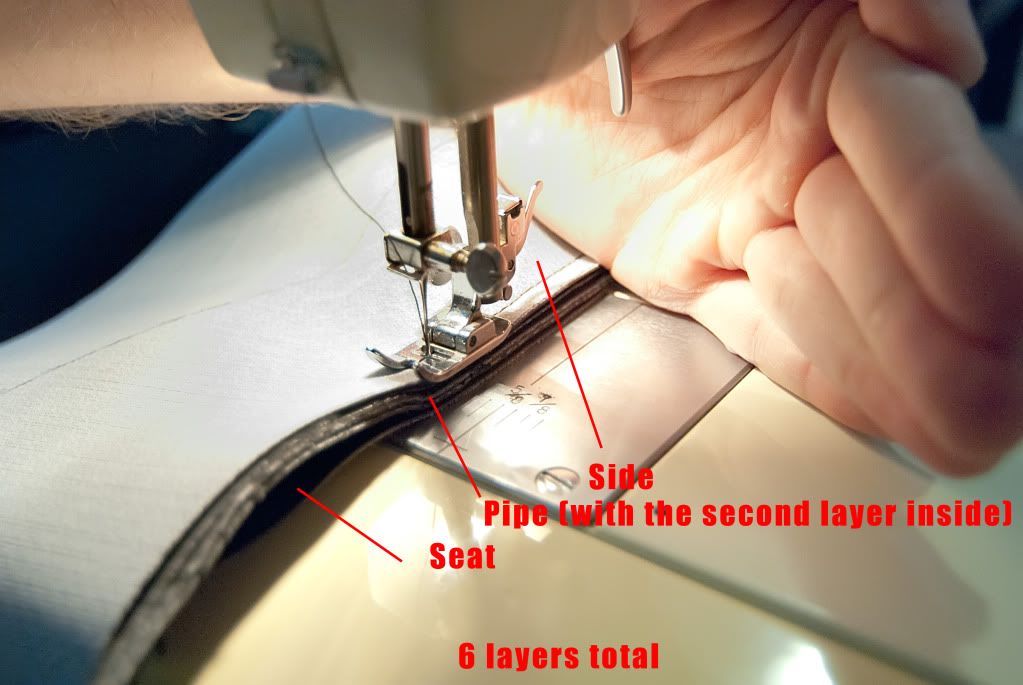
Again, remember all clean sides are touching. Now, this is a lot of fabric to be pushing through your machine. 6 layers of thick junk. You may want to take 6 layers of scrap and see if your machine can handle it. That will also give you the opportunity to calibrate tension and stuff.
Some tips:
- Use a long stitch pattern. I used the max my machine went. If you try a real tight one, you'll probably jam or saw through your fabric. Keep them stitches spaced!
- If your machine allows you to set needle position, set it to the far side of the presser foot. This will allow you to sew closer to the edge (the edge opposite the rough edge!!). It will give you more control and allow you to make a nicer pipe.
Soooo.... where do you start sewing? Well, I chose to start at the front seam of the seat (green seam). Find the halfway point on the front, and take your side piece, and place the edge of the side piece about a half inch passed the halfway point (remember, all sewing takes place about a half inch from the outside, so to create that green seam, you need to half that half inch point on the half point). This sounds confusing without a picture; I'm sorry. As for why I chose to start at the front, I reasoned the back area has more fabric to work with if I make a measurement mistake and needed to hide it.
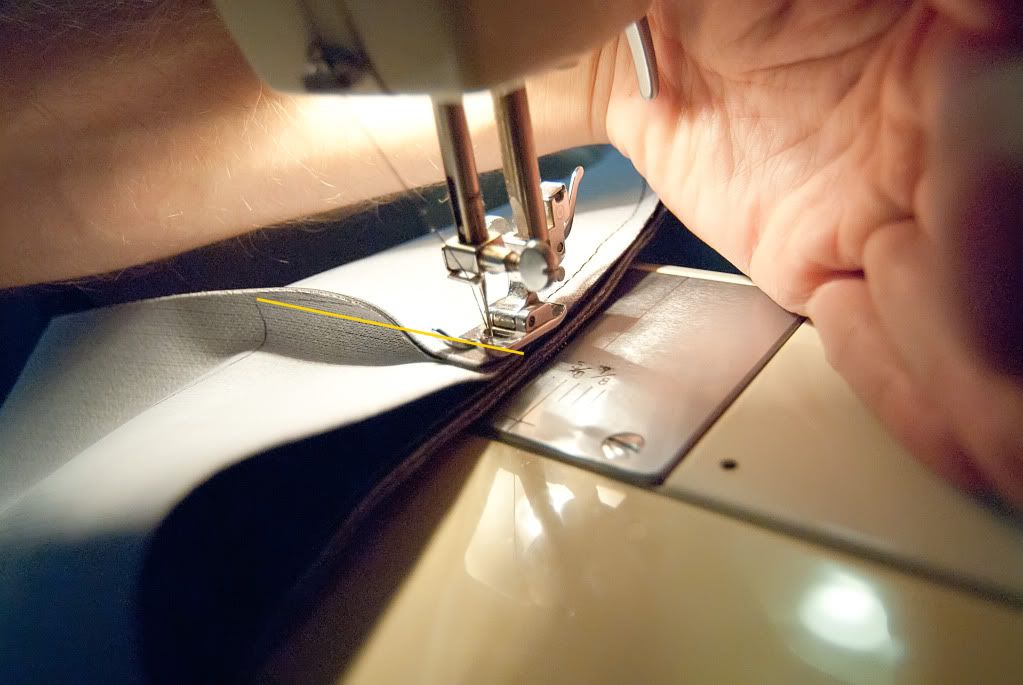
So anyway, start sewing one of your side pieces on, front to back. Make sure to take it easy going around those bends in the seat. They are the hardest to keep everything aligned in and you'll most likely screw those areas up easier than others. Keep going until you near the end of the first side piece (leave about an inch).
Congratulations, you reached the end of your first side piece! Now how the crap you get the other side piece joined in?
Well, I did it like this:
Pretty much, I took the second side, and pushed it up against the first, and then sewed over top of them. Remember to play the half inch game again, and allow the seam of each side piece to protrude a half inch up so you can meet in the middle all nice.
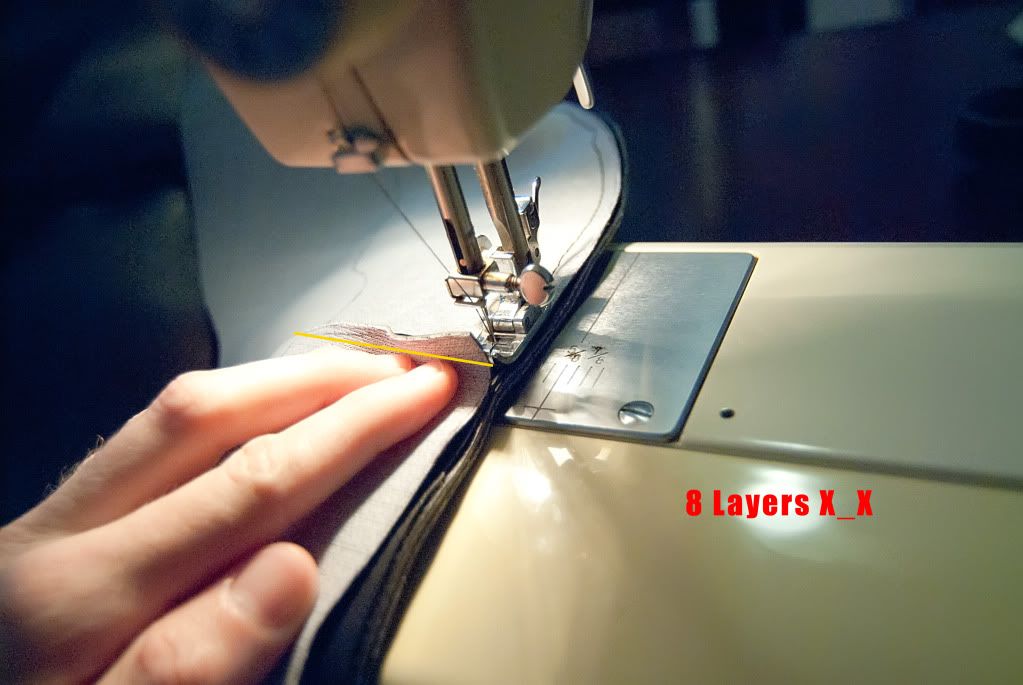
Hopefully your machine doesn't mind the extra two layers (now 8) it has to go through for a short stint.
Just push them together, and pull them through and hopefully you make it work out. After you get past that, continue on with the rest of the second side until you get to the front.
Step 5: Terminating the ends
Well crap, I failed on taking pictures of this. When I make the second version of this, I'll be sure to address it better. But pretty much you need to meet up with where you started and cut the pipe so the end butts up against the start of itself. Next you take a little rectangle of scrap fabric, wrap it around the two ends of the pipe, and then sew the last seam up onto itself in the same manner as you did when you reached your seam when you needed to start up the second side. If you look on the pipe of your stock seat, you'll see a little wrapping going around the pipe edging. Kind'a like it had been heat shrinked. This is the roll of the rectangle of fabric: to make it look all clean so you can't see a seam.
Step 6: Final seams
You'll need to hand stitch the green and yellow seams of the front and back. Again, failed pix on this one. Pretty much, sew straight back perpendicular along the seam. Explanation sucks with no pix.
Step 7: Stretch and staple
Throw your cover over the stock seat cover, or rip off the old and put on the new. Take your average T-50 like hand stapler, and start pulling and stapling the fabric to the plastic base. It works out real good and easy. Make sure to keep the cover even on both sides of the seat so it doesn't looks stupid.
And then you're done! Yay!

 Pages: 1

