There are several methods shown in the archives to fix a speedometer rattle. This isn't necessarily the best method, but it does have the advantage of completely getting rid of the springs as they really don't have enough compression strength to do much of anything useful.
The flip side is that this fix allows you to put more force on the speedometer and the mount legs. Since the speedo is semi-flimsy plastic construction you need to be mindful of the torque you put on those little nuts -- stay at moderate finger pressure using a bare long socket extender bar, please. A 3/8" wrench-type handle could be really too strong much much too easily.
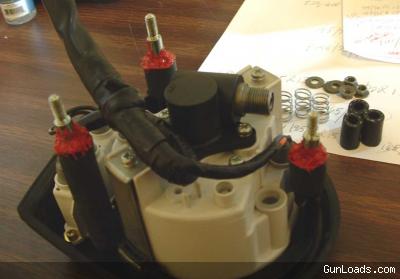
Take your tank off and take your speedo out. Clean things up a bit so you can see the fret wear marks where the steel tank tabs wore into the steel speedo mounting legs. These fret zones likely were the source of some of your noise, especially the one on the long unsupported steel speedo leg (you can just see that long skinny thing vibrating like a banjo string in your mind's eye).
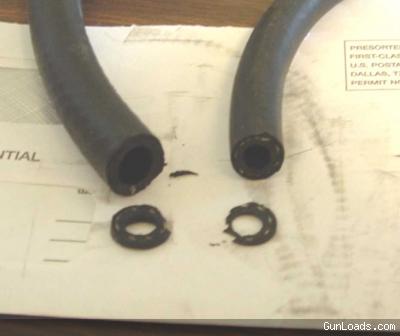
Go to the auto parts store and get a foot or so of 3/8" heavy wall fuel line and a foot of 1/4" heavy wall fuel line. Take your speedo with you, it will make picking things out a good bit easier.
The larger fuel line will slip over the bare steel leg, the larger supporting round plastic leg and go all the way down until it hits the bottom where the main housing starts. The OD of my large hose was 0.630" or there-abouts (fuel hose is sized by the nipple size it goes over, so don't expect it to make a lot of sense measurement numberwise).

The smaller 1/4" fuel line measures 0.500" or thereabouts on the OD. Note that both hoses have the nylon reinforcment threads internal to their construction.
Now cut the larger fuel hose to a length that goes from the bottom of everything up slightly past the fret mark on the unthreaded steel shaft part of each individual leg. You want your large hose to be taller than the fret mark. You want the hose to compress a tad when it gets tightened up, so it has to be a little bit longer than the fret mark distance (maybe 1/16" longer or 0.060" if you like digital measurements). Each of the three legs is different, so you will cut 3 custom leg covers out of the bigger tubing.
I can't give you a distance, every tank has the steel tabs on the tank welded on at slightly different points. Your fret marks tell you about your tank and the needed distances.
Now cut the smaller tubing to take up the distance between the big tubing and the start of the first thread (leaving off 1/8" for the tank tab thickeness and the washer thicknesses). Each of the three small tubes is a different length too. Note: you can post-tune these lengths later to jive with reality -- I had to.

Take your silicone RTV gasket stuff and pack it into the gap between the steel shaft and the tubing until you totally fill that little shoulder space and mound up a little heap so it will flatten & squish good when you bolt her up. Leave this sit in open air for at least 1/2 to 1 hour so the silicone will firm up some -- important step to let it firm up some. This gel time will change according to your local temperature and humidity.

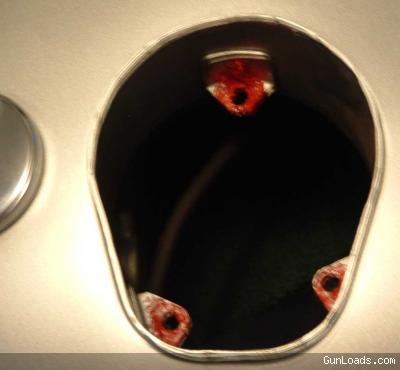
While your silicone is setting up on the speedo, prep your gas tank mounting tabs with some silicone too. On the front tab (towards your belly when riding) remember to put a wad of silicone on the tank wall next to the tab as the large round tubing will reach all the way over to this solid wall to make up a "controlling contact point" which will greatly reduce the chances of anything moving around later on. Give it a nice silicone bed to go to sleep in.

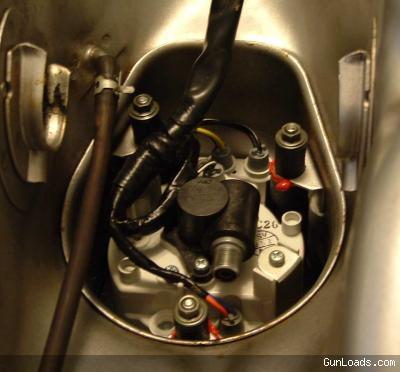
Long half to one hour, wasn't it? Slide it all together, put the small tubes in place and put the washers and nuts on. PLEASE REMEMBER TO GO EASY ON THE NUT TENSION - 2 to 3 INCH POUNDS MAX. You actually can put force on the legs now so you can damage them if you go overboard. Pull the nuts down until the rubber gasket on the outer flange of the speedo (the outside part you normally look at) pulls down to the tank all the way around and things firm up when pushing on the speedo from the outside (you know, like you used to do all the time to get it to shut up that hideous buzz/rattle noise).
Revisit the little nuts again after a half hour and snug them back up (they will relax as the silicone squishes up the shafts and out the gaps). Do it again in another half hour. Now wait longer and come back again in another hour and snug up any more slack that has developed. You will notice that slack isn't coming back like it used to -- time to STOP TIGHTENING THE NUTS.
Then give it overnight or 24 hours to harden up where it is now (let the RTV seize up on the shaft real good, check the little nuts again for firmness (2-3 inch pounds) and put your tank back on the bike.
Oldfeller

