Donate!
Welcome, Guest. Please Login or Register :: View Members
Pages: 1 2 
Send Topic Print
Soothing the Savage Seat (w/pics) (Read 501 times)
Balderdash
Full Member
***
Offline


Posts: 117
Minnesota
Gender: male
Soothing the Savage Seat (w/pics)
07/19/07 at 10:33:06
 
Problem: I’ve got a sore butt from the old stock seat and gel seats cost upwards of $200 to $300+, even used ones on e-bay, and I’d rather keep that money as ‘padding’ in my wallet thank you very much.

Solution; Gel the existing seat myself.

What I used:
Pliers (to pull the old staples out)
Flathead Screwdriver (to help pry up the staples)
A marker
Spray on Adhesive (I used 3M 77 spray)
Gel padding (I used the motorcycle pad from this company, SHOCKtec, it’s a gel that doesn’t need to be ‘bagged’) Standard  size (12"x18") $34.95
Foam Padding for filler to smooth edges of the gel when it is on top of the seat, I used SHOCKtec Air2Gel HD from the same company, 1/8"   $16.60 half roll.
Scissors
Staple Gun
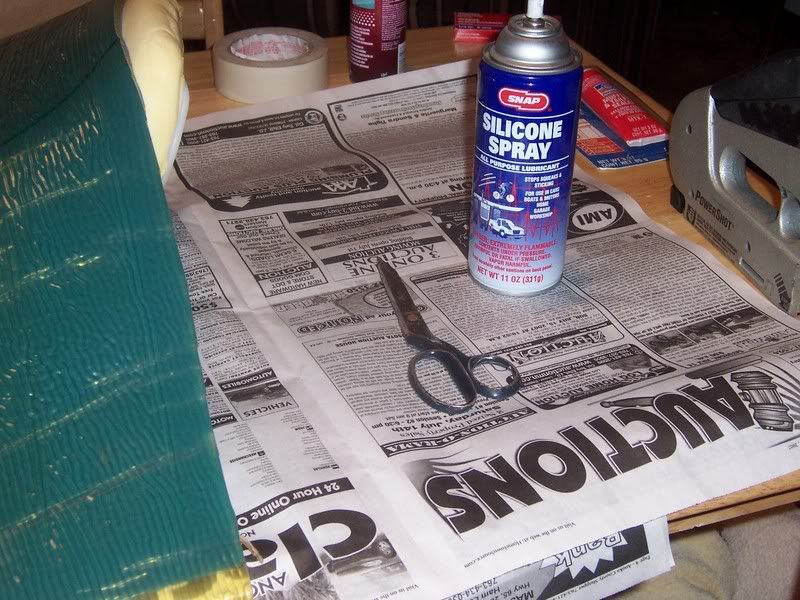
Silicone Spray (to spray on the scissor when you cut the gel padding, the SHOCKtec people were nice enough to tell me this little trick to make it easier to cut)

Here’s the subject before the operation.
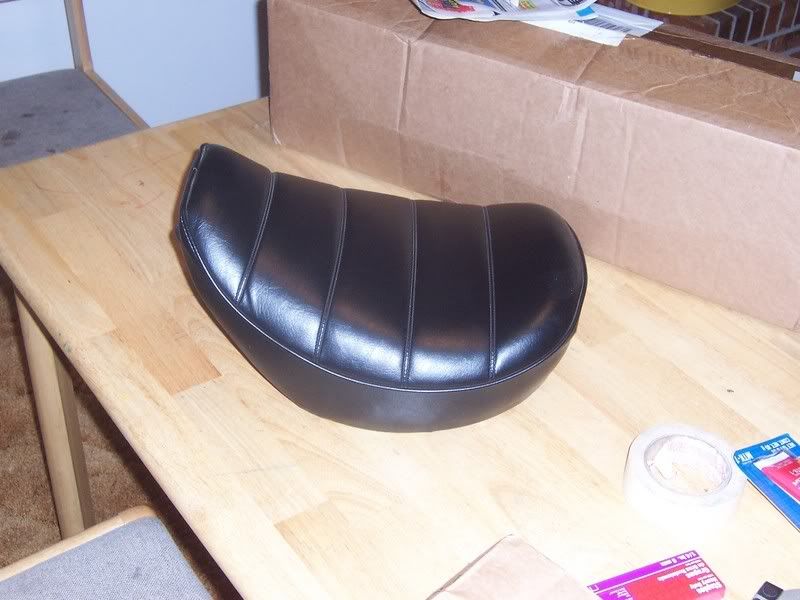


First I turned it over and marked where the cover was fitting now, I think I want to purposely leave it looser than those marks when I reattach it because it will have more padding under there and I don’t want the cover to rip from holding down too much more padding.
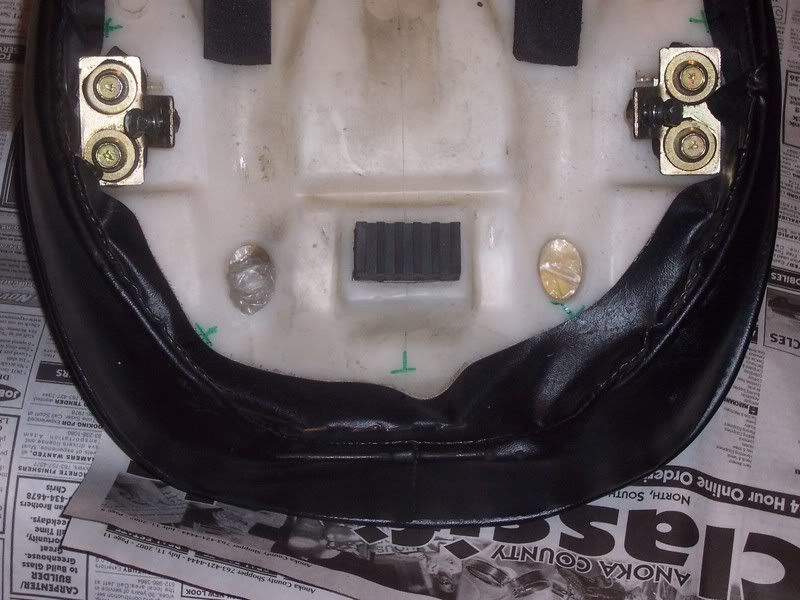


Pull the staples and remove the cover
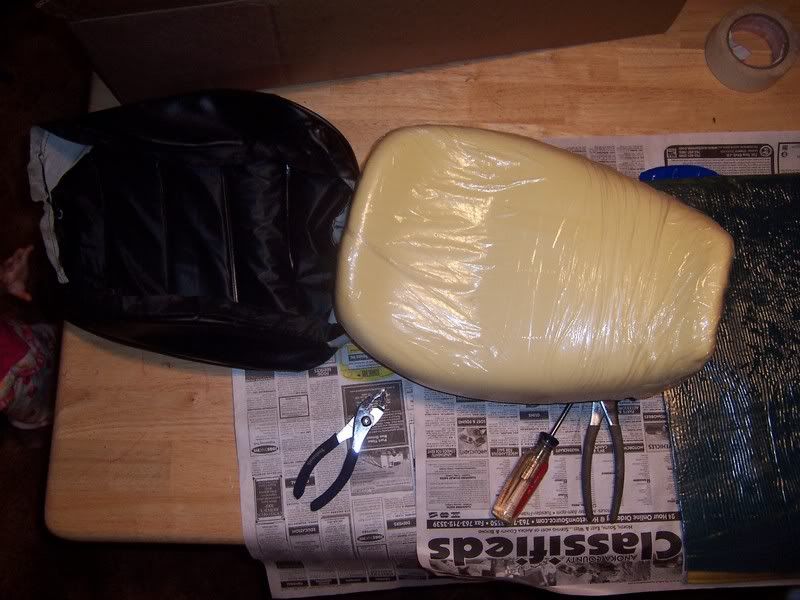


Pull up the pad and turn it over to remove the plastic baggy water protection
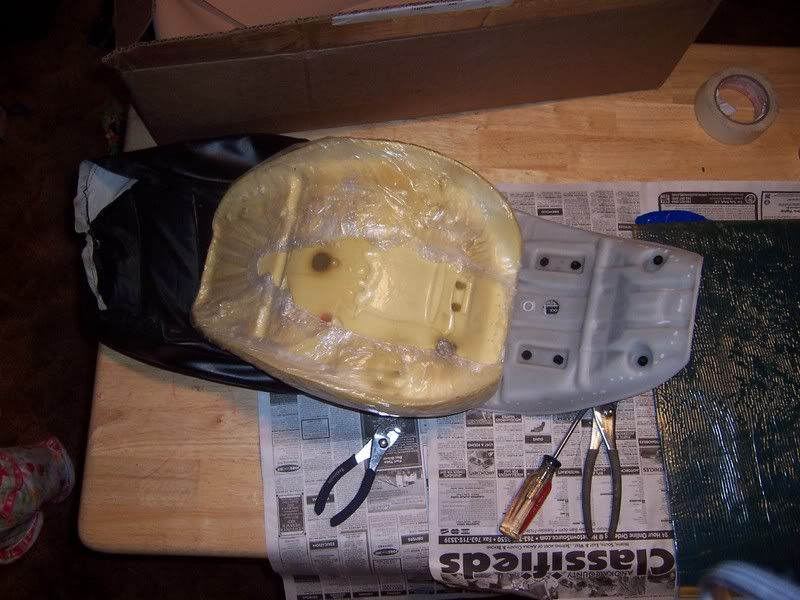


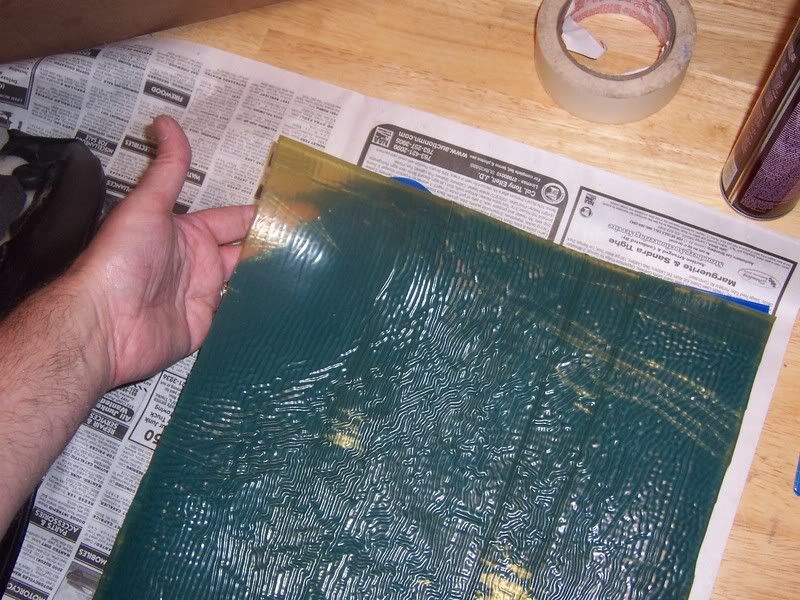
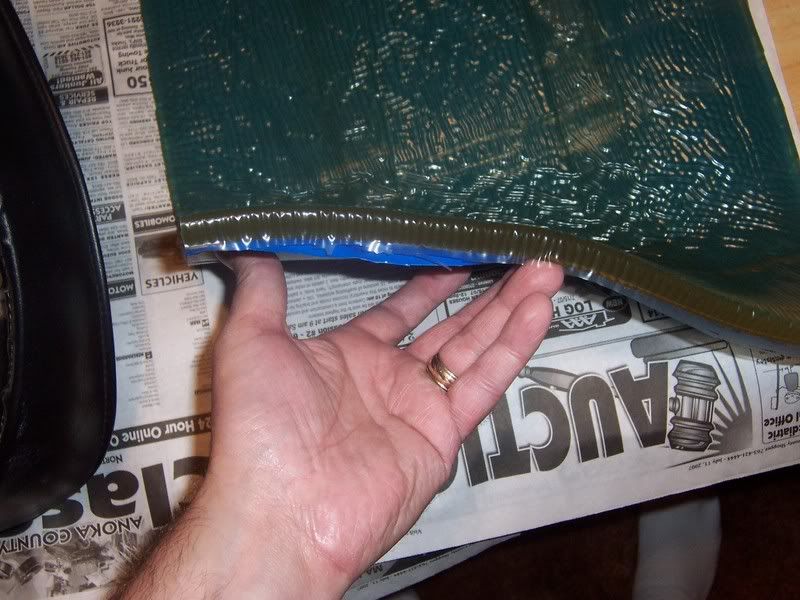
Cut Gel Padding to fit.  I purposefully did NOT cover the back part of the seat that comes up.  I stopped at the base of that ridge because I don’t want the seat to be pushing me any farther forward when sitting on it, so I covered directly under my butt space and in front of it when I cut my egg shaped seat covering.


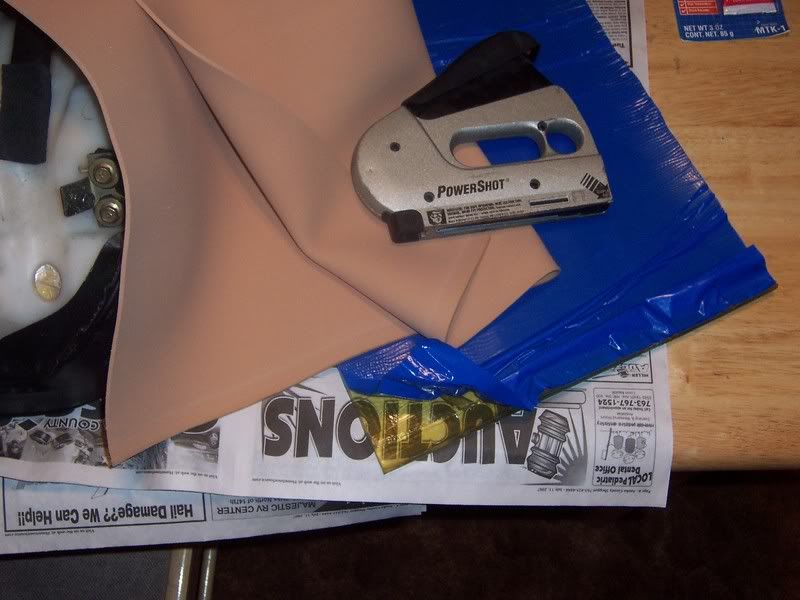
Tan foam:

After I cut and re-cut the gel padding to the exact shape I wanted it I peeled off the blue plastic sheeting you can see in the pictures (the gel padding has some sticky glue under that sheet and it is there to help hold the pad in place, but I also sprayed the entire top of the foam seat with spay adhesive and then pushed the gel padding sticky side down on top of the seat.

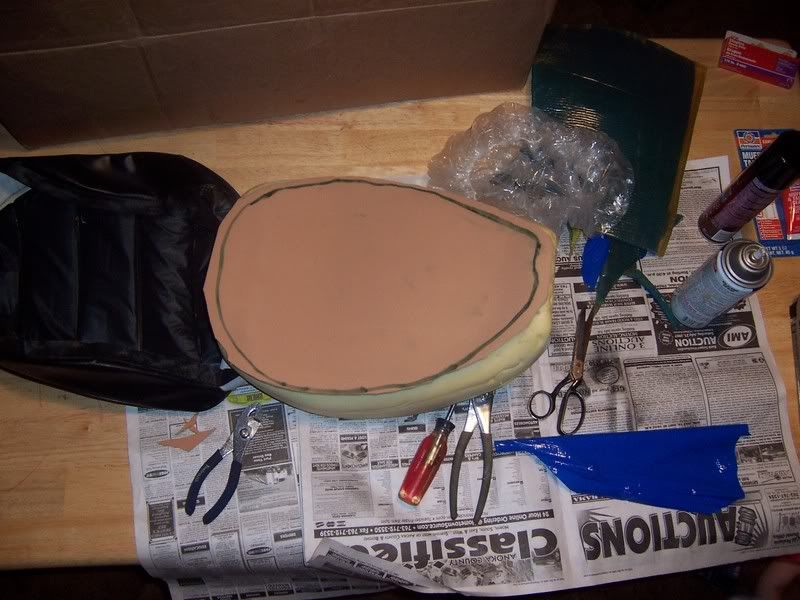
I then cut a larger oval of the tan 1/8 inch foam to cover the gel, I want it to overlap the gel under it so that it will round off the edges of the gel when under the seat cover.  I sprayed both the gel padding top and the bottom of the foam with adhesive and stuck the foam on top
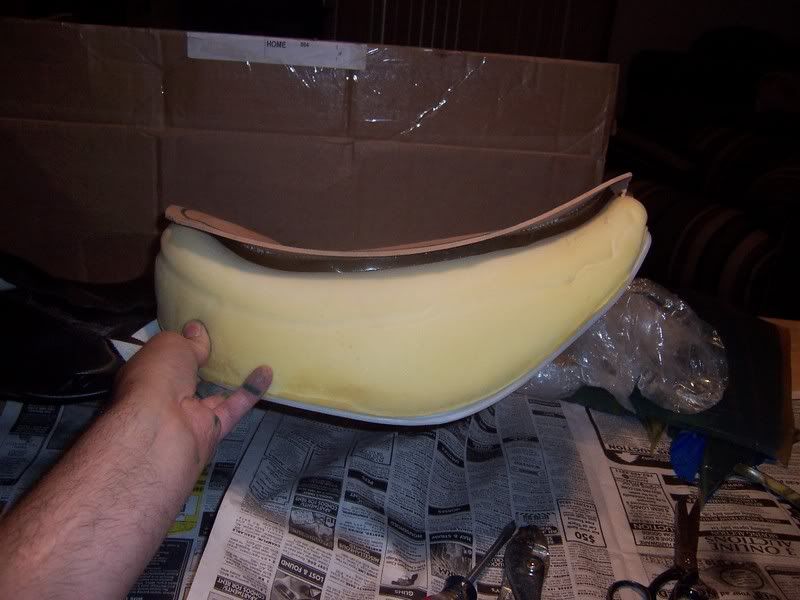


The green line shows you the size of the gel padding underneath so you could see the size difference between the two.


I then re-covered the seat with the water baggy shield and then the old seat cover, stapling it everywhere it was stapled before and making sure to not pull it all the way up to the old lines I had made to mark the old location, (will have to wait and see how long it lasts before it tears a hole and I’ll just recover the seat with the leather from an old jacket or something like that….

Here’s my new and improved Gel Seat on the bike
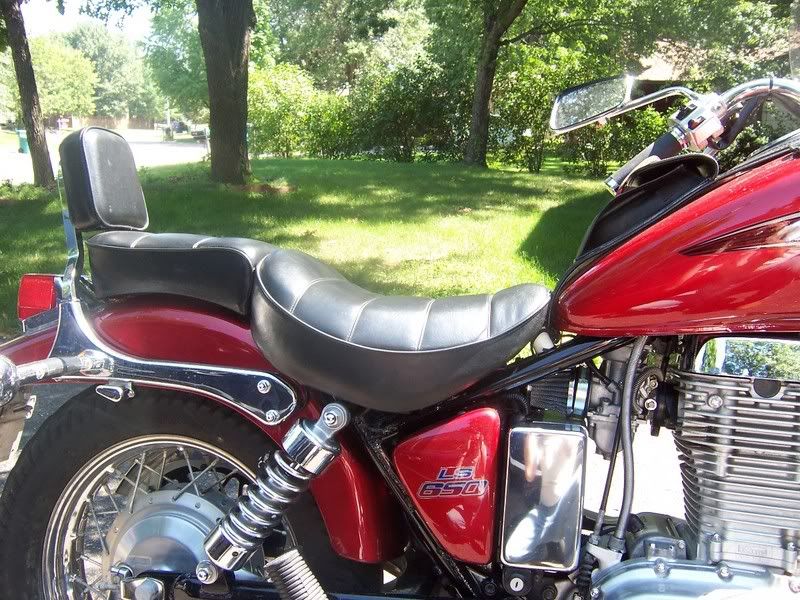


I've got plenty of gel padding and foam padding left to do the back pad and sissy bar seat as well.  Even though I bought the regualr seat pad size from SHOCKtec they sent me plenty of gel to get the job done, they were extremely helpful on this as well, very courteous and very fast shipping to boot, I highly recomend their prodect and their customer service.
Back to top
 
 
  IP Logged
thumperclone
Serious Thumper
Alliance Member
*****
Offline

PGR rider  riding
with respect

Posts: 6230
Grand Junction Colorado
Gender: male
Re: Soothing the Savage Seat (w/pics)
Reply #1 - 07/19/07 at 11:17:47
 
nice mod/good job!!notice an improvment?
Back to top


standing for those who stood for US


  IP Logged
Balderdash
Full Member
***
Offline


Posts: 117
Minnesota
Gender: male
Re: Soothing the Savage Seat (w/pics)
Reply #2 - 07/19/07 at 11:35:40
 
thumperclone wrote on 12/31/69 at 16:00:07:
nice mod/good job!!notice an improvment?


It feels firmer, holds you up better even while you are pushing the cushion down while sitting on it.  I feel like I am sitting slightly higher (I suppose I am higher) but I'm 5'11" and the extra space is a good thing for me.

I got used to the changed seat real fast because the seat doesn't feel like it's under-padded anymore, it holds me better and I can slide around better, this might be because I didn't re-enforce the upswing at the back of the seat, it's still there though and it holds me in place put it doesn't feel like it's pushing me forward.

I won't be looking for a new seat anymore, this is doing what I wanted (but I still might have to recover it if the old cover pops...)
Back to top
 
 
  IP Logged
Balderdash
Full Member
***
Offline


Posts: 117
Minnesota
Gender: male
Re: Soothing the Savage Seat (w/pics)
Reply #3 - 07/23/07 at 07:17:10
 
UPDATE:

On Saturday I finally went on more than a 20 minute drive with the re-padded seat, this time a 150 mile, 70mph, interstate drive, stopping only for gas and jumping back on the road again...

To put it bluntly, it worked beautifully; the difference between the two is like the difference between night and day.
Back to top
 
 
  IP Logged
praetorian
Ex Member


Re: Soothing the Savage Seat (w/pics)
Reply #4 - 07/28/07 at 16:09:39
 
Thanks so much for all the pics and the info.  I have been looking for a gel manufacturer to do this exact thing for some time.  Now that I have the links, I'll be able to redo my seat and then I will hopefully be able to ride for more than 20 minutes before I have to stop due to an aching tail bone.
Back to top
 
 
  IP Logged
BigWes
Ex Member


Re: Soothing the Savage Seat (w/pics)
Reply #5 - 07/28/07 at 21:02:29
 
you are more resorsful than i could ever hope to be Embarrassed. ill just drop the 200+
Back to top
 
 
  IP Logged
GaryF
YaBB Newbies
*
Offline

'04 Savage on Oregon
Coast

Posts: 5
Oregon South Coast
Gender: male
Re: Soothing the Savage Seat (w/pics)
Reply #6 - 08/02/07 at 07:39:40
 
Balderdash-

Just completed the gel pad installation last night and it went very smoothly following your method.  Thanks immensely for the time and effort to "document" the process complete with photos and post it.  Took me about 2 hours total from removing the seat to re-installing.   Grin

Great mod that should be added to the technical section for others to have ready access to.

Thanks again; highly recommended improvement.
Back to top
 
 
  IP Logged
SavageWahine
Serious Thumper
*****
Offline

Aloha & Hang
Loose

Posts: 1553
Beautiful Kauai!
Gender: female
Re: Soothing the Savage Seat (w/pics)
Reply #7 - 08/24/07 at 22:19:46
 
Balderdash wrote on 12/31/69 at 16:00:07:
Problem: I’ve got a sore butt from the old stock seat and gel seats cost upwards of $200 to $300+, even used ones on e-bay, and I’d rather keep that money as ‘padding’ in my wallet thank you very much.

Solution; Gel the existing seat myself.

What I used:
Pliers (to pull the old staples out)
Flathead Screwdriver (to help pry up the staples)
A marker
Spray on Adhesive (I used 3M 77 spray)
Gel padding (I used the motorcycle pad from this company, SHOCKtec, it’s a gel that doesn’t need to be ‘bagged’) Standard  size (12"x18") $34.95
Foam Padding for filler to smooth edges of the gel when it is on top of the seat, I used SHOCKtec Air2Gel HD from the same company, 1/8"   $16.60 half roll.
Scissors
Staple Gun
Silicone Spray (to spray on the scissor when you cut the gel padding, the SHOCKtec people were nice enough to tell me this little trick to make it easier to cut)

Here’s the subject before the operation.

http://img.photobucket.com/albums/v233/Ph33r/Gel_Seat/100_1061.jpg

First I turned it over and marked where the cover was fitting now, I think I want to purposely leave it looser than those marks when I reattach it because it will have more padding under there and I don’t want the cover to rip from holding down too much more padding.

http://img.photobucket.com/albums/v233/Ph33r/Gel_Seat/100_1066.jpg

Pull the staples and remove the cover

http://img.photobucket.com/albums/v233/Ph33r/Gel_Seat/100_1067.jpg

Pull up the pad and turn it over to remove the plastic baggy water protection

http://img.photobucket.com/albums/v233/Ph33r/Gel_Seat/100_1068.jpg

Cut Gel Padding to fit.  I purposefully did NOT cover the back part of the seat that comes up.  I stopped at the base of that ridge because I don’t want the seat to be pushing me any farther forward when sitting on it, so I covered directly under my butt space and in front of it when I cut my egg shaped seat covering.


http://img.photobucket.com/albums/v233/Ph33r/Gel_Seat/100_1064.jpg
http://img.photobucket.com/albums/v233/Ph33r/Gel_Seat/100_1065.jpg
http://img.photobucket.com/albums/v233/Ph33r/Gel_Seat/100_1069.jpg

Tan foam:
http://img.photobucket.com/albums/v233/Ph33r/Gel_Seat/100_1063.jpg

After I cut and re-cut the gel padding to the exact shape I wanted it I peeled off the blue plastic sheeting you can see in the pictures (the gel padding has some sticky glue under that sheet and it is there to help hold the pad in place, but I also sprayed the entire top of the foam seat with spay adhesive and then pushed the gel padding sticky side down on top of the seat.

I then cut a larger oval of the tan 1/8 inch foam to cover the gel, I want it to overlap the gel under it so that it will round off the edges of the gel when under the seat cover.  I sprayed both the gel padding top and the bottom of the foam with adhesive and stuck the foam on top

http://img.photobucket.com/albums/v233/Ph33r/Gel_Seat/100_1070.jpg

The green line shows you the size of the gel padding underneath so you could see the size difference between the two.

http://img.photobucket.com/albums/v233/Ph33r/Gel_Seat/100_1071.jpg

I then re-covered the seat with the water baggy shield and then the old seat cover, stapling it everywhere it was stapled before and making sure to not pull it all the way up to the old lines I had made to mark the old location, (will have to wait and see how long it lasts before it tears a hole and I’ll just recover the seat with the leather from an old jacket or something like that….

Here’s my new and improved Gel Seat on the bike

http://img.photobucket.com/albums/v233/Ph33r/Gel_Seat/100_1072.jpg

I've got plenty of gel padding and foam padding left to do the back pad and sissy bar seat as well.  Even though I bought the regualr seat pad size from SHOCKtec they sent me plenty of gel to get the job done, they were extremely helpful on this as well, very courteous and very fast shipping to boot, I highly recomend their prodect and their customer service.

Thanks for the great instructions!!
I noticed you use a powershot too. What size staples did you use? 8mm?
I'll go check SHOCKtec and see how much the shipping is going to cost me!
Back to top


You take the blue pill the story ends, you wake up in your bed and believe whatever you want to believe.
You take the red pill, you stay in Wonderland and I show you how deep the rabbit hole goes.
  IP Logged
Balderdash
Full Member
***
Offline


Posts: 117
Minnesota
Gender: male
Re: Soothing the Savage Seat (w/pics)
Reply #8 - 09/18/10 at 08:09:57
 
UPDATE:

I know this is an old thread, but I sold the red Suzuki 650 and bought a '08 Suzuki 650 and wanted to redo my seat again, so I looked up this thread to make sure I was remembering everything.

Happy to report that I never felt the urge to replace the seat again and the seat cover never tore, after 17,000+ miles were put on it after that mod, sold the bike because the engine was needing more work than I am willing to do this winter (drive the bike daily, can't afford the down time).

BTW: I had to search the forum for this thread, I thought it was in the technical under mods, but didn't find it there    :'(  Maybe it could go in the DIY section?
Back to top
 
 
  IP Logged
justin_o_guy2
Serious Thumper
*****
Offline

What happened?

Posts: 55279
East Texas, 1/2 dallas/la.
Re: Soothing the Savage Seat (w/pics)
Reply #9 - 09/18/10 at 08:32:10
 
Good & successful mods should be posted where they dont get lost.

You didnt really explain just exactly how you were able to decide the shape of the gel & how it was laid into the original foam. Orrr, I misseed that part,, which coulda happened.
Back to top


The people never give up their liberties but under some delusion.- Edmund Burke.
  IP Logged
verslagen1
YaBB Moderator
ModSquad
*****
Offline

Where there's a
will, I want to be
in it.

Posts: 28905
L.A. California
Gender: male
Re: Soothing the Savage Seat (w/pics)
Reply #10 - 09/18/10 at 08:37:38
 
Yes It's a good DIY article and should be in the tech section.
It's in my favorite's till then.

Have you thought about adding the tailbone relief mod?
Back to top
 
 
WWW   IP Logged
Balderdash
Full Member
***
Offline


Posts: 117
Minnesota
Gender: male
Re: Soothing the Savage Seat (w/pics)
Reply #11 - 09/18/10 at 08:43:55
 
justin_o_guy2 wrote on 09/18/10 at 08:32:10:
Good & successful mods should be posted where they dont get lost.

You didnt really explain just exactly how you were able to decide the shape of the gel & how it was laid into the original foam. Orrr, I misseed that part,, which coulda happened.


The green circle drawn on the tan foam is the shape of the gel pad under it.  I let the tan foam overhang so that it would round off the edges when it was covered again, and with that in mind the shape of my pad was determined by the shape of the top of the original seat itself, about a half inch short of the edge in every direction (except the back, I did not cover the upturned part of the original seat).  I stopped the gel pad at the original seat up turn because I didn't want to make the seat shorter, and that seemed to work out well.  The seat felt natural the whole time I had it after that.

I used 3M spray adhesive with the idea that it would be enough to keep the gel from sliding around during use.  I don't know if it was needed, but the gel never moved or needed adjustment.  I used the spray glue on top of the gel for the same reason to hold the tan foam in place, but the waterproof seat cover didn't get any glue.
Back to top
 
 
  IP Logged
Balderdash
Full Member
***
Offline


Posts: 117
Minnesota
Gender: male
Re: Soothing the Savage Seat (w/pics)
Reply #12 - 09/18/10 at 08:46:05
 
verslagen1 wrote on 09/18/10 at 08:37:38:
Yes It's a good DIY article and should be in the tech section.
It's in my favorite's till then.

Have you thought about adding the tailbone relief mod?


If you mean a V cut or a hole for the tailbone, yes, I'm thinking about it for my new seat, but to be honest, I never felt the need for it with the old seat, just always looking for improvements and it seems the manufactured seats have all moved to some idea of allowing the tailbone to sink further down without pressure.
Back to top
 
 
  IP Logged
verslagen1
YaBB Moderator
ModSquad
*****
Offline

Where there's a
will, I want to be
in it.

Posts: 28905
L.A. California
Gender: male
Re: Soothing the Savage Seat (w/pics)
Reply #13 - 09/18/10 at 09:24:56
 
Balderdash wrote on 09/18/10 at 08:46:05:
If you mean a V cut or a hole for the tailbone, yes, I'm thinking about it for my new seat, but to be honest, I never felt the need for it with the old seat, just always looking for improvements and it seems the manufactured seats have all moved to some idea of allowing the tailbone to sink further down without pressure.

I'm thinking of the cuts on the seat pan mod, maintains the shape w/o creating an obvious divot.
Back to top
 
 
WWW   IP Logged
Boofer
Serious Thumper
*****
Offline

Nearly too old.

Posts: 1760
N Ms
Gender: male
Re: Soothing the Savage Seat (w/pics)
Reply #14 - 09/18/10 at 18:16:54
 
I had the tailbone ache, so I bought some memory foam at WalMart and had a guy install it over the old original foam. (His idea) I told him my problem and he suggested one layer only. Since he has done this for 40 years, I gave it a try. It is 1 1/2 inches and works like a charm. That was about a year ago. Still works. His labor was $20 and he took care of a tear on the side of the seat.
Back to top


2001 Black, Spitfire windshield, Headlight upgrade, Sissy rack, Tool bag, Fork bag, Harley muffler, Memory foam seat, Crash bars. Hwy pegs, Raptor.
  IP Logged
Pages: 1 2 
Send Topic Print


« Home

 
« Home
SuzukiSavage.com
11/10/24 at 08:56:09


General CategoryRubber Side Down! › Soothing the Savage Seat (w/pics)


SuzukiSavage.com » Powered by YaBB 2.2!
YaBB © 2000-2007. All Rights Reserved.